
Share this page


Creating and Managing Workflow Transitions
Workflow transitions link stages in a workflow; executing a transition moves an issue record from one workflow stage to another.
In AccuRev, a workflow transition is represented as an orange rectangle, like the to Scheduled and cancel transitions shown in the following illustration:
![]()
Note that one transition, like cancel in this illustration, can be shared by multiple source stages (New and Scheduled) but can have only one target stage (Closed).
The rest of this section provides more information about the components that make up a transition and the ways to create and edit transitions in the Workflow Editor. To learn how to link one stage to another, see Linking Workflow Stages.
Workflow Transition Components
A workflow transition consists of a name and, optionally, conditions and validation actions:
-
Name. By default, transitions created by the Stage Generator are given the name
to <stage name>. For example, to_WIP and to_Scheduled. If you create a transition, or rename a transition created by the Stage Generator, use names like assign and schedule and not transition 1 and transition 2, for example. AccuRev enforces uniqueness for transition names.See Editing Workflow Transitions for more information on renaming a transition.
- Conditions. By default, transitions created by the Stage Generator are not defined with a condition; none is needed to create a functional workflow. If you want, you can define a condition that is used to determine whether or not the transition is available. For example, you might want to define a condition that restricts use of certain transitions to specific users or groups.
- Validation Actions. By default, transitions created by the Stage Generator are not defined with a validation action; none is needed to create a functional workflow. Executing a transition simply moves the issue from the current stage to the destination stage associated with the transition. If you want, you can define validation actions that are performed when the transition is executed. For example, you might define an action for the assign transition linking the Scheduled and WIP stages that automatically sets an issue record’s Assigned To field to a certain user.

Ways to Create Workflow Transitions
There are two ways to create workflow transitions in AccuRev:
-
Automatically. When you use the Stage Generator to create stages, AccuRev also creates a transition that uses that stage as its destination stage. For example, if you use the Stage Generator to create a stage based on the Scheduled value for your issue records’ Status field, the Stage Generator automatically creates the Scheduled stage and the to Scheduled transition, as shown in the following illustration:
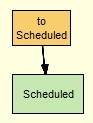
The transition is given a default name that indicates the destination stage (in this example, the transition is named to Scheduled). You can rename the transition and create actions and conditions as necessary. See Editing Workflow Transitions for more information.
See Create stages automatically to learn how to use the Stage Generator to create workflow stages and transitions.
- Manually. When you link one stage to another, you can use existing transitions associated with the destination stage, or you can create a new transition on-the-fly.
See Linking Workflow Stages for more information.
Note: You cannot create a freestanding transition. A transition must always have a destination stage.
Editing Workflow Transitions
You can perform the following types of edits on a transition:
- Rename the transition
- Create or change transition actions and conditions
See Deleting a Workflow Transition to learn about deleting workflow transitions.
How to Edit a Workflow Transition
To edit a transition:
-
In the AccuRev Web UI, click the Admin menu and choose Open Workflow.
The Open Workflow dialog box appears.
-
Choose the depot and the workflow you want to open and click Ok.
The Workflow Editor appears.
- In the workflow diagram, select the transition you want to edit.
-
Click the Edit button (
 ) on the Workflow Editor toolbar.
Alternative: Right-click the transition and choose Edit from the context menu.
The Edit Transition dialog box appears.
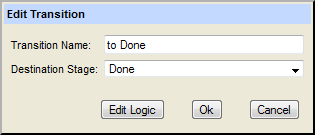
-
To rename the transition or choose a different destination stage, make the required change, then click Ok and go to Step 7.
To add or modify transition actions, click the Edit Logic button.
The Edit Transition dialog box expands to display the Conditions and Validation Actions tabs.
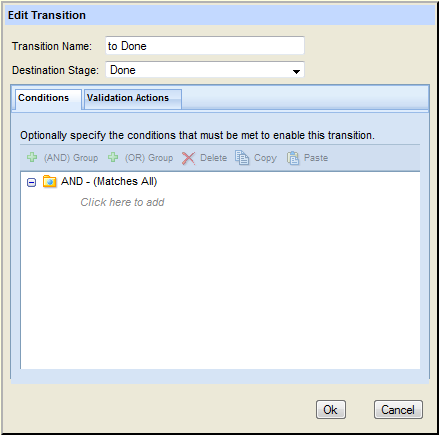
See Specifying Actions for Stages and Transitions for more information on defining actions.
- When you are done specifying the transition conditions and actions, click Ok.
- Click the Save button (
 ) to save your changes to the workflow.
Deleting a Workflow Transition
When you delete a transition from a workflow, you also delete the link between the two stages that are joined by that transition. For example, in the following illustration, deleting the to Scheduled transition...
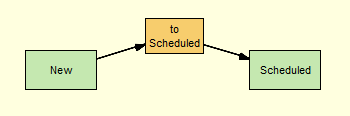
... removes any association between the New and Scheduled workflow stages:
![]()
Tip: AccuRev displays a confirmation message when you delete a transition.
How to Delete a Transition
To delete a transition:
- In the Workflow Editor, select the transition you want to delete.
-
Click the Delete button (
 ) on the Workflow Editor toolbar.
Alternative: Right-click the transition and choose Delete from the context menu.
AccuRev deletes the transition from your workflow.
- Click the Save button () to save your changes to the workflow.


