Edit Lifecycle dialog box
In the Edit Lifecycle dialog box, edit the states, transitions, and rules of a lifecycle.
Edit Lifecycle sections
The Edit Lifecycle dialog box has the following sections:
| Section | Description |
|---|---|
| Toolbar |
Use the toolbar buttons to perform the following tasks:
|
| Filter bar |
Select from the available lists to highlight parts of the lifecycle model and narrow down the displayed content:
|
| Interactive lifecycle model |
Displays a diagram where you can select states and transitions. The contents of the Transitions and Attribute Rules sections are based on what you select in the diagram. For details, see the Interactive lifecycle model. |
| Transitions | Displays a list of possible transitions and the roles required for each transition. For details, see the Transitions section. |
| Attribute Rules | Displays the attributes and their rules for the state selected in the lifecycle model. For details, see the Attribute Rules section. |
Interactive lifecycle model
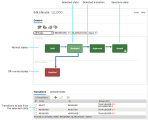
The interactive lifecycle model displays normal and off-normal transition states on separate rows:
-
The normal transition states are displayed in the path in which they are followed. They are connected by gray arrows that indicate the normal transitions.
-
The off-normal transition states are displayed under the normal lifecycle path.
You can scroll the diagram horizontally if it is wider than the window.
To select a state, click the state or select it in the State filter. The arrows representing the possible transitions into that state become highlighted in light blue, and the transitions out of it become highlighted in dark blue. When a state is selected, the Transitions area shows only the possible transitions to and from that state. When no state is selected, all the transitions for the lifecycle are displayed.
When a request type is selected in the Object Type filter, and phases have been defined for that request type, the phases are displayed as a gray background against the lifecycle states to which they apply.
When an item type is selected in the Object Type filter, and build stages have been configured for Dimensions Build for that item type, the build stages are displayed as a gray background against the lifecycle states to which they apply.
A lifecycle state that is defined as sensitive is indicated by the lock icon.
You can create a new transition by clicking in one state and dragging the mouse pointer into another state. This displays New Transition dialog box.
Lifecycle model with a selected state
Transitions section
The Transitions section of the Edit Lifecycle dialog box displays the possible transitions in or out of the selected state.
If you have selected an object type in the Filter bar, it also lists each attribute for which a role has a defined rule. If no state has been defined, it displays all transactions for all states of the lifecycle.
Use the toolbar buttons to perform the following actions:
-
Add a new transition.
-
Edit a transition.
-
Delete one or more transitions.
For details, see Manage transitions.
The Transitions displays combinations of transition with each role that is authorized to action the object types through this state. If a role is selected in the Filter bar, only that role is displayed in the list.
Next to each role, an icon indicates whether the role is optional or pending.
| Icon | Description |
|---|---|
|
O |
Optional. This means that actioning an object to the transition's from state does not require a user holding that role. If the role is not optional, the actioning is disallowed if there are no users holding that role. |
|
P |
Pending. The object is displayed in the user's inbox, and the user receives an email notification when the object is actioned to the from state for the transition. If the role is not pending, the object is not displayed in the user's inbox and the user does not receive an email notification but can still perform the actioning. |
Attribute Rules section
The Attribute Rules section of the Edit Lifecycle dialog box displays the attributes and their rules for the state selected in the lifecycle model.
Use the toolbar buttons to perform the following actions:
-
Add a new attribute rule.
-
Edit one or more selected attribute rules.
-
Delete one or more selected attribute rules.
-
Export selected attribute rules to a .csv file.
-
Import attribute rules from a .csv file.
For details, see Set attribute rules.
The Attribute Rule table displays combinations of attribute and role that have a rule. Only those attribute rules that apply to the role selected in the Filter bar are displayed. For each rule, the following information is displayed:
-
Attribute name.
-
The From and To states for which the rule applies.
-
The associated role. If a role is not selected in the Filter bar, the row is repeated for each role for which there is a rule.
-
The rules indicating whether the attribute is required and whether the user can update the attribute:
Required The attribute must have a value before the object type can be actioned to a new state. Writeable The attribute can be updated by this role when the object type is at this state.
 See also:


