Share this page


This section describes how to define, manage, and maintain the testing resources used for server-side testing.
Note: A Tenant Admin user has read-only permissions on the Hosts module, except for permissions to reconfigure hosts, add pools and locations, and assign hosts to pools. In addition, a Tenant Admin user has full permissions over Tenant private LGs. For details, see Predefined admin roles.
Add a host
Create hosts to run in your performance tests.
To add a host:
-
Prerequisites.
-
Before adding a host, ensure that at least one server is in an operational state.
-
Check that the required testing tools are installed on your hosts. Refer to the documentation for your specific testing tools for installation instructions.
-
If a host you are adding is in a remote location, the location must be added in the Administration > Maintenance > Hosts > Locations tab. For task details, see Manage host locations.
-
If a host you are adding is over a firewall, the host must communicate with a Performance host through an MI Listener. Make sure that the MI Listener was added in the Administration > Maintenance > Hosts > MI Listeners tab. For task details, see Specify MI Listeners.
-
To use cloud-based hosts in a performance test, see Add elastic hosts to a test.
-
-
Create a new host.
From Description Site Management -
Sign in to Administration. For details, see Sign in to Admin area.
-
Select Maintenance > Hosts. Select the Hosts tab, and then click the Add Host button
 .
.
Performance testing application -
Sign in to Performance testing application. For details, see Sign in.
-
Click the module name or the dropdown arrow in the banner, and select Hosts. Click the Add Host button
.
Site Management
-
Sign in to Site Management. For details, see Sign in to Site Management.
-
Select the Hosts tab and click the Add Host button
.
-
-
-
Configure the new host (not all fields listed below are displayed in the user interface).
UI Element Description Host Name
The name or IP address of the new host. Click the host name link to display the host's details in the Host Details view. We recommend giving the host a meaningful name in the Domain\Windows level.
Note:
-
Host Name can contain either an FQDN or an IPv4 or IPv6 address.
-
If Host Name is FQDN, the total length of the name (including "[test]") is limited to 93 characters.
-
Do not use the host
[Test]ElasticCont{ID}in a test.
Tenant Name
The name of the tenant to which the host is assigned.
Note: Available in Site Management only at the site level; not the tenant level.
Description
(Optional) A description of the host. Host Installation
Select the installation type of the host:
-
Windows Host. Indicates that this Windows host can be used for performance purposes (Controller, Load Generator, or Data Processor).
-
Unix Load Generator. Indicates that this Unix host is used as a standalone load generator for performance tests.
-
OneLG. Indicates that this Windows host is used as a standalone load generator for performance tests.
Note:
- The load generator uses TLS (SSL) to communicate with the Controller during runtime only. For non runtime functionality, such as including collating results, the load generator does not use TLS as the communication protocol.
- Relevant only for load generator hosts located over a firewall.
Purpose
Select a purpose for the host: Controller
 , Data Processor
  , or Load Generator
  . For details, see Hosts overview
-
If the host machine is located over a firewall, or is a UNIX machine, it cannot function as a Controller or Data Processor.
-
If you select OneLG or Unix Load Generator as the host installation option, Load Generator
is automatically selected as the purpose for the host and the other options are unavailable.
Status
Indicates the status of the host. You can also change the status of the host. The possible statuses are:
-
Operational
 . The host machine is up and running.
 -
Non-operational
 . The host machine is down.
 -
Unavailable
 . The host machine is not available (there is no information available about the status of the host).
Type
Displays the host type: Local if the host exists in your testing lab, or Cloud if the host was provisioned from a cloud provider. If you have existing load generators on the cloud, you must first define network settings as described in Add cloud-provisioned hosts to your lab.
Priority
Assign a priority (1-9) to the host. The higher the priority, the more likelihood a host is allocated to a test. There are a number of criteria to consider when assigning priority. The main considerations are whether the host is a dedicated machine or a shared resource, and the type of hardware installed on the machine.
Location
Select the location of the host. Locations can be defined according to physical areas. The location also determines whether the host is located over a firewall; if it is, you must select an MI Listener to enable data collection.
Note for Site Management only: Hosts are automatically assigned to the Default location and cannot be assigned to any other location.
MI Listener
If the host is located over a firewall, enter the IP address or name of the MI Listener that enables data collection.
Note: Not available in Site Management, or in Administration if the location of the host is not over a firewall.
LR Agent User
Displays the domain and user name of the agent that enables communication between the Controller, Load Generators, and MI Listeners. If the field is empty, the default Local System user account is used.
If you configure the LoadRunner Agent service with a local or a domain user, it will also set the user under which LoadRunner Agent is running, to that user.
Note: When using TruClient 2.0 scripts, we recommend providing a user account other than the System user.
For details, see Configure the LoadRunner Agent.
Enable SSL
Select if you want the load generator host to communicate with the Controller using TLS (formerly SSL).
Note: The load generator uses TLS to communicate with the Controller during runtime only. For non runtime functionality, such as including collating results, the load generator does not use TLS as the communication protocol.
Enable IPv6 Select to use IPv6 for communicating with the load generator host. When selected, the host and the DNS must also be configured with IPv6.
Note: When this option is selected, the host connection check fails because the environment does not allow outgoing connections with IPv6. Outgoing connections are allowed for port 80 only.
-
-
Click Assign Pools and select pools to assign to the host. Host pools enable you to control which hosts are allocated to which projects. When allocating hosts for a test, the system allocates hosts from the host pool of the project. Hosts must be assigned to at least one pool.
Note for Site Management only: Hosts are automatically assigned to a general pool and they cannot be assigned to any other pool.
-
Click Assign Host Attributes and select the system attributes of the host, such as memory, strength, or installed components.
For details on defining host attributes, see Customize load generator attributes.
Note: Not available in Site Management.
-
Click Save to add the host to the Hosts grid.
After adding a host to the Hosts grid, the following additional fields can be displayed by clicking the Select Columns button
 (in Site Management, only the ID field is available).
UI Elements
Description
Privacy Type
Indicates whether the host is public or private.
-
Private host. A private host is one that is created by a customer in a load test; only the customer can perform actions on this host.
-
Public host. A public host is any host that is not private, which is created and managed by a Site Administrator.
ID
The host ID. State
The current activity on the host.
-
Idle. Indicates that the host is not being used.
-
Installing. Indicates that a remote host is being installed on the host.
-
Rebooting. Indicates that the host is restarting.
-
<Run states>. Indicates the host state during a performance test run.
-
<Data processing states>. Indicates the state of the host during a data processing task.
- <Provisioning states>. Indicates the provisioning status of a cloud host. Host State changes to idle once the host is provisioned.
Version
Lists the version of hosts (including patches), standalone load generators, and upgrades installed on the host machine.
Note: While hosts from older installations (up to two versions earlier) are still supported, we recommend upgrading them to the latest version before using them. Earlier versions are no longer supported and cannot be used to run tests.
Active Timeslot ID
The ID of the timeslot for which this host is reserved, and which is now open. Click the link to view timeslot details in the Timeslot dialog box. For details, see Timeslot Details Tabs.
Note: When running a test and OpenText Enterprise Performance Engineering is connected using a PostgreSQL database server, this field is empty if the time zone of the database server’s operating system is not aligned with the time zone in the postgresql.conf file on the database server machine. For details on aligning the time zone, see PostgreSQL Database servers.
Created By
The user who created the host. Created in Project
The project in which the host was created. Created on Date
The date and time the host was created. Note: The cloud settings are relevant only for hosts provisioned from a cloud provider.
-
-
To display only those hosts that meet the criteria that you define, use the Filter button
 to select the parameters to include. For details, see Filter displayed items.
-

Add elastic hosts to a test
You can run elastic hosts in your performance tests. This automates the testing process by provisioning hosts on demand in response to dynamic workloads and seamlessly adding them to tests.
This is a quick and effective way to port applications across systems and machines, and run them within their own secure environments. This also reduces costs because you no longer need to maintain dedicated load generator machines; you can just provision hosts when you need them.
Elastic host types
You can use the following types of elastic hosts.
| Type | Description |
|---|---|
| Elastic Cloud | You can automatically provision and de-provision load generators from the cloud using Elastic Cloud hosts. For details, see Provision elastic cloud load generators. |
| Elastic Docker |
You can automatically provision and de-provision load generators from Docker containers using Elastic Docker hosts. For details, see Provision Docker hosts automatically. You can also manually configure and assign Dockerized hosts to a performance test from the REST API, or create them from Administration, which users can then assign to tests. For details, see Provision Docker hosts manually. |
Add cloud-provisioned hosts to your lab
When adding a host from your test lab, you can select an existing load generator in the cloud and make it accessible using the port and proxy settings defined in the Cloud Network Settings dialog box.
To add elastic hosts to a test:
-
Prerequisites.
Make sure that you have defined the network settings for communicating with your cloud provider and your cloud-based load generators. For details, see Configure cloud network settings.
-
Create a new host.
When configuring the host, select the following:
-
Purpose. Select Load Generator.
-
Host Installation. Select a standalone load generator: Unix Load Generator or OneLG.
-
Source. Select Cloud.
For details on creating a host, see Add a host.
-
-
Click Save to save your settings. The port and proxy settings defined in the Cloud Network Settings dialog box are automatically used for communicating with the cloud host.
View or edit host details
This task describes how to view and edit host details.
To view or edit hosts:
-
Open the Hosts grid.
From Description Administration -
Sign in to Administration. For details, see Sign in to Admin area.
-
Select Maintenance > Hosts.
Performance testing application -
Sign in to Performance testing application. For details, see Sign in.
-
Click the module name or the dropdown arrow in the banner, and select Hosts.
Site Management
-
Sign in to Site Management. For details, see Sign in to Site Management.
-
Select the Hosts tab.
-
-
In the Host Name column, click a host name, and use the following tabs to view or edit host detail.
Note: For Site Management, only the Host Details tab is available.
Tab Details Host Details Describes the currently selected host. For user interface details, see Add a host
Runs Displays the test runs performed on the selected host, including the state of the test run, the start, end time and duration of the test run, the number of Vusers that were initialized at least once during the run, and the maximum number of concurrently running Vusers during the run. Event Logs Displays detailed information about the tasks performed on the selected host, including the event type (an indication of the event's severity: error, warning, or info), a description of any errors, and the category of action where the event occurred.
Check Host Status Displays the checks performed on the selected host, including the areas (Configuration, Connectivity, Installation, Performance) and sub-areas (Processor, Memory, System) that were checked, the expected and actual value resulting from the host check, and the host check status (Passed or Failed). Installations Lists all of the software programs installed on the selected host, including the version, publisher, and date the software was installed. Components Lists the components installed on the host machine, including versions, patches, and upgrades. Services Lists all the services on the selected host, including service status (Running or Stopped), and the way the service is set to start up (automatically, manually, or if the service is unavailable). Processes Displays information about the processes and resource usage of the selected host, including the percentage of processor time and memory used by the process, and the amount of elapsed time because the process started.
Note: Processes and resource usage information for UNIX machines or Windows Standalone Load Generators cannot be displayed.
Over Firewall Displays communication settings between the load generator host and the MI Listener, and enables configuring over-firewall settings for the selected load generator host. For details, see Configure over-firewall settings
Note: This tab is only displayed if the location of the host is defined to be over a firewall.
After configuration is complete, the LoadRunner Agent service runs under the specified user.
Delete hosts
You can delete hosts from your project.
To delete hosts:
-
In Administration, select Maintenance > Hosts.
-
Select the hosts that you want to remove, and click the Delete Hosts button
 .
. -
Click Delete to confirm. The selected hosts are deleted and removed from the grid.
Tip: You can also delete a host from the host details page by clicking More Options ![]() , and selecting Delete Host.
, and selecting Delete Host.
Export host details to an Excel file
To export information displayed in the Hosts grid to an Excel file, click the Export to XLS button  . Data from the Hosts grid is saved to an Excel file and downloaded to the Downloads folder of the client user.
Import hosts from Excel
You can import hosts from an Excel file to the Hosts grid in Administration.
To import hosts from Excel:
-
Create an Excel file and populate it with data.
-
Create an Excel file with the following column header names: Name, Status, Purpose, Location, Belongs to Pools (or Pool), Host Installation (or Installation), Priority, Host Attributes (or Attributes), and MI Listener if you are assigning MI Listeners to hosts. Column names (and data entries) are case insensitive and do not need to be in this order.
-
Enter the required data for each host exactly as it is displayed in the user interface. Use a vertical bar "|" to separate multiple host attributes, and a semi-colon bar ";" to separate multiple host purposes.
For details, see Configure host details..
Note:
-
Alternatively, you can create a file template based on an exported Excel file by deleting the host data and the ID, Host State, and Version columns, and then populating the file with details of the hosts that you want to import. For details, see Export host details to an Excel file.
-
If you are importing hosts that have MI Listeners assigned to them, you must display the MI Listener column in the Hosts grid before you export the host details to Excel.
-
-
In Administration, select Management > Hosts. On the Hosts toolbar, click the Import Hosts (Excel) button
 .
. -
In the Import Hosts (Excel) dialog box, click Select and find the location of the Excel file you want to import. The file must be in .xlsx format. Select the file, and click Open.
-
Click OK. The Import Hosts (Excel) dialog box displays the import status for each host. Hosts that are imported successfully are added to the Hosts grid.
Check connections to testing hosts
You can check connections to your testing hosts.
To check connections to testing hosts:
-
Open the Hosts grid.
From Description Administration -
Sign in to Administration. For details, see Sign in to Admin area.
-
Select Maintenance > Hosts.
Performance testing application -
Sign in to Performance testing application. For details, see Sign in.
-
Click the module name or the dropdown arrow in the banner, and select Hosts.
Site Management
-
Sign in to Site Management. For details, see Sign in to Site Management.
-
Select the Hosts tab.
-
-
Select the hosts that you want to check in the Hosts grid, and click the Check Host button
 .
. Note:
-
You can check the status of up to 10 hosts at one time.
-
If the load generator connection verification fails during the host check, any hosts in the idle and operational state become Non-Operational.
-
Check host uses IPv4 unless a load generator was added with its IPv6 address.
-
-
Based on the purpose and location of the host, the following checks are performed.
Check Performed Regular* LG Host UNIX LG Host Standalone LG Host OFW LG Host Controller Host Data Processor Host Ping to Host Yes Yes Yes N/A Yes Yes Remote Installations Yes N/A N/A N/A Yes Yes Services Yes N/A N/A N/A Yes Yes Performance Yes N/A N/A N/A Yes Yes Over Firewall Status N/A N/A N/A Yes N/A N/A Ping to Host Yes Yes Yes N/A Yes Yes *This is the Host for Windows installation. After performing the installation, the host can be configured as a load generator from the Administration site.
Tip: You can also check host connections from the host details page by clicking the More Options ![]() , and selecting the Check Host button .
, and selecting the Check Host button .
Reconfigure hosts
When reconfiguring a host, the following actions are performed:
-
The host's licenses file that is installed on the database is updated (if you delete licenses in the LRKEY.txt file, all licenses on that host are restored).
-
System User (IUSR_METRO) is recreated on the host.
-
Communication Security passphrase is restored or updated in "lts.config".
-
The OpenText Performance Engineering Remote Management service is started on the host and the host status is updated on the host machine.
Note:
-
You can reconfigure hosts in Idle state only.
-
IUSR_METRO user is removed from hosts on upgrade.
Resolution: Run Reconfigure Host for all hosts that were upgraded, or remove and add the hosts back to the server (this adds the user back to the hosts).
-
When reconfiguring multiple hosts simultaneously:
-
The number of hosts that can be configured in bulk is limited to approximately 30 in Administration (there is no limit in the Performance testing application or Site Management).
-
The operation fails if you do not have a sufficient number of connections open to the database.
Resolution: Limit the number of hosts being reconfigured, (or for PostgreSQL) increase the number of connections by editing the postgresql.conf file.
-
| From | Description |
|---|---|
| Administration |
Tip: You can also reconfigure a host from the host details page by clicking More Options |
| Performance testing application |
|
|
Site Management |
|
Restart hosts
This task describes how to remotely restart host machines.
Note: In Site Management, restarting hosts is available for public hosts only.
To restart hosts:
-
Open the Hosts grid.
From Description Administration -
Sign in to Administration. For details, see Sign in to Admin area.
-
Select Maintenance > Hosts.
-
Select the hosts in the Hosts grid that you want to restart, and select Maintenance > Reboot Host
 .
.
Tip: You can also restart a host from the host details page by clicking More Options
 , and selecting Reboot Host .
Performance testing application -
Sign in to Performance testing application. For details, see Sign in.
-
Click the module name or the dropdown arrow in the banner, and select Hosts.
-
Select the hosts in the Hosts grid that you want to restart, and select Maintenance > Reboot Host
 .
.
Site Management
-
Sign in to Site Management. For details, see Sign in to Site Management.
-
Select the Hosts tab.
-
Select the hosts in the Hosts grid that you want to restart, and click the Reboot button
.
-
-
The Reboot Host dialog box opens, displaying the overall result for each restart performed on the host, including the start and end time, the administrator who performed the restart, and the restart progress (
 ,
,  , or a progress bar).
 Note:
-
You can only restart Controller and Load Generator hosts when the host state is Idle.
-
You cannot restart a UNIX Load Generator host.
-
You cannot restart load generator hosts located over a firewall.
-
To restart Windows OneLG machines from OpenText Enterprise Performance Engineering, you need to add the IUSR_METRO local user and password to the OneLG machine.
-
Kill a host process
Note: Available in Administration only.
This task describes how to kill host processes. A user with Viewer permissions can end the selected process.
To kill a host process:
-
In Administration, select Maintenance > Hosts.
-
In the Name column, click a host name, and then click the Processes tab.
-
Select the process you want to end in the grid, and click Kill Process.
Click the Refresh button
 to refresh the grid so that it displays the most up-to-date list of processes.
Configure the LoadRunner Agent
Note: Not available in Site Management or for Linux load generators.
The LoadRunner Agent is an application that can be run either as a process (magentproc.exe) or as a service (magentservice.exe). The service is required to enable a load testing script to be run remotely, without having to physically sign in to the load generator machine to activate the agent as a process.
When run as a service, it is run by a service named Agent Service. The service is created either during the installation phase, or post-installation from the menu added to the operating system.
Alternatively, you can run Vusers in an interactive RDP session while the agent remains as a service. For details, see Run Vusers in an interactive RDP session.
For details on manually configuring the agent user on each host or standalone load generator machine, see Working with the agent.
To reconfigure the Agent service:
-
In the Administration > Maintenance > Hosts module, select the hosts in the Hosts grid that you want to reconfigure, and select Maintenance > Configure LoadRunner Agent
 .
. In Performance testing application > Hosts, select the host in the Hosts grid that you want to reconfigure, and click Maintenance > LoadRunner Agent Configuration
. -
In the LoadRunner Agent Configuration dialog box, select Use another account, enter the host account credentials, and click OK.
Note: For TruClient 2.0 scripts, we recommend providing a user other than the System user.
-
The task progress window displays the overall result for each configuration performed on the selected hosts (and restoration task if the configuration fails), including the configuration start and end time, and the configuration status (Passed
or Failed ).For hosts where the change is successful, the agent user configuration data is added to the LoadRunner Agent User column in the Hosts grid.
Note: If OpenText Enterprise Performance Engineering is unable to configure the host using the credentials supplied, it automatically attempts to recreate the service using with the LocalSystem user account.
-
The following actions require a public key: LR Agent configuration, Reboot, Get Processes, Kill Processes, Get Components(OPLG only), Get OneLG version (OPLG only). For details, see Public keys.
-
Users that will be used for the configuration, must be granted all of the following policies in the Local Security Policy:
-
Create global object
-
Log on as a batch job
-
Log on as a service
-
Access this computer from the network
-
Allow log on locally
-
Impersonate a client after authentication
-
Run Vusers in an interactive RDP session
You can run Vusers in an interactive RDP session to support testing UI-based protocols.
-
Prerequisites
The following prerequisites must be applied on the load generators used for running the test in RDP mode.
Prerequisite Description Install the Media features component The Media Feature pack is required to ensure that FreeRDP has all the necessary codecs to render the remote desktop session (otherwise it won't work).
Download the Media Feature Pack from the Microsoft Download Center (if it is not installed by default).
Enable Media Features Perform the following to enable Media Feature on your Windows operating system.
Windows Desktop:
-
From the Start menu, select Turn Windows features on or off. This opens the list of Windows features.
-
Scroll down and select Media Features.
-
Click OK, and wait until Windows turns on Windows Media Player and other media features.
Windows Server:
-
From the Start screen, select Server Manager.
-
In Server Manager, select Manage > Add Roles and Features. Click Next until the Features page appears.
-
In the Features page, select Media Foundation (on Microsoft Windows Server 2008 R2 select Desktop Experience).
-
Assign permissions to allow the agent to be configured in the Remote Desktop Users group.
-
Open the Group Policy Management editor focused on an appropriate Group Policy object.
-
Go to Computer Configuration\Policies\Windows Settings\Security Settings\Local Policies and select the User Rights Assignment node.
-
The agent must be run with user in the Remote Desktop Users group. If Remote Desktop Users group is not listed in the policy, click Add User or Group and add it manually. By default, Remote Desktop Users are allowed to log on through Remote Desktop Services.
-
-
Set RDP timeout policies
We recommend removing the time limits for RDP sessions to prevent sessions being disconnected before the performance test has finished.
-
Open the Local Group Policy Editor for the specific users.
-
Go to User Configuration > Administrative Templates > Windows Components > Remote Desktop Services > Remote Desktop Session Host > Session Time Limits.
-
Right-click Set time limit for active Remote Desktop Services sessions and click Edit.
-
Select either Not Configured or Disabled.
-
Repeat for the End session when time limits are reached policy.
-
-
-
Configure the LoadRunner Agent account
Select the hosts you want to use in RDP mode and insert your domain user, or local user for non domain joined machines, and password as described in Configure the LoadRunner Agent above.
-
Configure a performance test with RDP mode
-
In the banner, click the module name or arrow and select Test Management > Tests & Scripts.
-
Select a performance test in the test management tree and click Edit Test.
-
In the Performance Test Designer window, click Groups and Workload, and on the Groups pane toolbar, click More > LG Management.
-
Select the load generator types on which you want to enable RDP, and click Enable RDP.
Tip: We recommend setting RDP mode for specific load generators. If you use it for automatch load generators, you must verify your LoadRunner Agent is configured correctly on all load generators in the pool when the load generators are assigned.
-
Select the required color depth and resolution to be used to create the RDP session on the hosts running the script (the graphic card of the hosts running the script determine the default color depth and resolution if it does not support the selected one).
-
Click OK, and then save and run the test. The load generator setting with RDP mode is persistent for the specific test only.
For more details, see Configure remote desktop session settings.
-
Notes and limitations for RDP sessions
The following notes and limitations apply to RDP sessions.
| Area | Description |
|---|---|
| RDP mode not supported |
|
| LoadRunner Agent |
|
| RDP port |
Makes sure you use the default RDP port, 3389, when running Vusers in an interactive RDP session. |
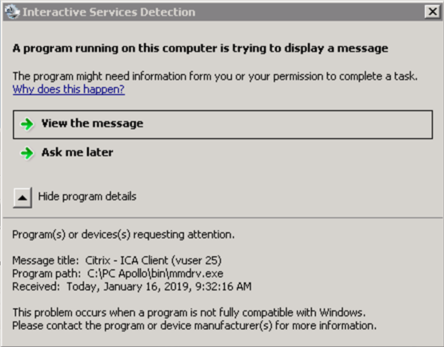
| Citrix |
|
Assign hosts to host pools
Note: Not available in Site Management.
You can populate host pools in one of the following ways:
-
From the Hosts tab. You can link a host to one or more host pools.
-
From the Pools tab. You can link one or more hosts to a host pool. For details, see Manage host pools.
To link a host to one or more host pools from the Hosts tab:
-
Select the hosts you want to assign in the Hosts grid, and click the Assign Hosts to Pool button
 .
. -
Select pools in which to include the hosts, and click Assign.
Define host settings
Note: Available in Administration only.
You can globally define connectivity and data processing for all hosts from the host settings.
-
In Maintenance > Hosts, click the Host Settings button
 .
. -
To configure Controller settings, click the Controller tab, and set the following:
-
Connectivity. Enter the timeout, in seconds, for checking load generator connectivity. The default is 30 seconds.
-
Offline Results. Specify the retention period, in days, for storing offline run result files. Files that were created before this time are deleted. The default time limit is 30 days.
-
-
To configure data processor timeout settings, click the Data Processor tab, and set the following:
-
Data Processor Timeslot minimum length (minutes). The minimum amount of time to allot to a data processor timeslot. The default is 30 minutes.
-
Timeout for pending Data Processor task (minutes). The amount of time allowed for a data processing task to remain in a pending state. The default is 2880 minutes.
-
Configure over-firewall settings
Use the Over Firewall tab to view communication settings between the load generator host and the MI Listener, and configure advanced over-firewall settings for the selected load generator host.
Note:
-
Available in Administration only.
-
This tab is only displayed if the location of the host is defined to be over a firewall.
-
A host over a firewall can be used only as a load generator host.
-
In Administration, select Maintenance > Hosts.
-
In the Host Name column, click a host name, and select the Over Firewall tab.
-
Configure the over-firewall settings as required.
Setting Description Connection Timeout (seconds) The length of time that the agent waits before retrying to connect to the MI Listener machine. If zero, the connection is kept open from the time the agent is run.
Default: 20 seconds.
Note: This is a required field.
Connection Type - TCP/HTTP Select either TCP or HTTP, depending on the configuration you are using.
Default: TCP
HTTP HTTP settings for the HTTP connection type:
-
Proxy Name. The name of the proxy server. This field is mandatory if the Connection Type option is set to HTTP. The proxy server must support the HTTP tunneling using the CONNECT method.
-
Proxy Port. The proxy server connection port. This field is mandatory if the Connection Type option is set to HTTP.
-
Proxy Username. The user name of a user with connection rights to the proxy server.
-
Proxy password. The password of the user with connection rights to the proxy server.
-
Proxy domain. The user's domain, if defined in the proxy server configuration. This option is required only if NTLM is used.
MI Listener Password The password required to connect to the MI Listener machine.
MI Listener User Name The user name required to connect to the MI Listener machine.
Polling Timeout (seconds) To verify the state of the load generator located over a firewall, the load generator connected to the MI Listener is checked.
If the load generator has not connected to the MI Listener machine for a period of time longer than the amount of time set in the Polling Timeout, the state of the load generator is changed to Resource Failure.
Default: 60 seconds
Note:
- This is a required field.
- Polling Timeout is an OpenText Enterprise Performance Engineering setting. It is not set in the LoadRunner agent.
- Polling Timeout needs to be longer than the Connection Timeout.
Use Secure Connection Enables connection using the TLS (SSL) protocol. When a proxy is used, TLS is enabled by default and cannot be turned off.
Default: Cleared
-
Check server certificates. Authenticates the TLS certificates that are sent by the server. Select Medium to verify that the server certificate is signed by a trusted Certification Authority. Select High to verify that the sender IP matches the certificate information. This setting is available only if Use Secure Connection is set to True.
-
Private Key password. The password that may be required during the TLS certificate authentication process. This option is relevant only if the Client Certificate Owner option is enabled.
-
Use client certificate. Enable to load the TLS certificate (if required by the server to allow the connection to be made). This option is relevant only if the Use Secure Connection option is enabled.
Default: Cleared
-
 See also: