
Share this page


Manage team demand
Team Demand tab enables the team manager to access and manage team demand from a central place.
Prerequisites:
-
You have the Edit Resource Pools or the Edit All Resource Pools access grant.
-
You are the team manager, or the manager of its parent team.
View team demand
The team Demand tab lists the positions that request resource assignment from your team and its subteams and resource allocation to each of the positions during a specific time period .
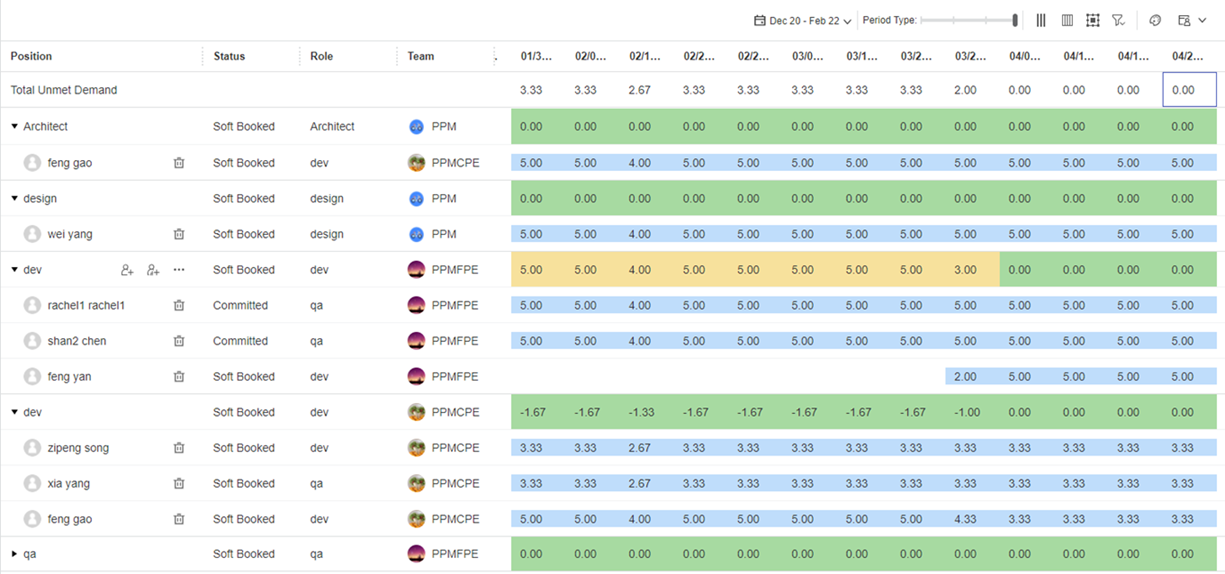
It includes a table:
-
The left part of the table displays the staffing profile, status, requested role, resource type, and team of each listed position.
-
The right part of the table displays the unmet demand of each listed position.
-
The position that already has resource assignment from your team and its subteams has a triangle before it. Expand the position to view details of each assignment: resource's name, role, team, resource type, and status.
-
The top part of the table displays the total unmet demand of all listed positions.
UI elements available in the Demand tab
| UI Element | Description |
|---|---|

|
Time period of the demand displayed. For details, see Time period filter. |

|
Specifies how time is divided. The default value is month. To change the period type: Click the slider and select the preferred period type: year, quarter, month, or week. Note: If set to week, when the start date of the first week or the end date of the last week falls out of the time period you specified, these two weeks in the Demand tab only display the position's unmet demand and resource's assignment that fall into the time period. For example, if you set the time period from December 2020 to March 2021, then the first week of this time period is from November 29 to December 5, and the last week is from March 28 to April 3. The first week only displays the position's unmet demand and resource's assignment of December 1 to 4 and the last week only displays the unmet demand and assignment of March 29 to 31. |

|
Selects the columns displayed in the left part of the table.
|

|
Adjusts the column width. To adjust the column width: Click the Column width button, and then drag the slider to the left or right to adjust the width of the time period columns. |

|
Groups team demand. For details, see Group data in the Demand tab. |

|
Filters team demand. For details, see Advanced filter. |

|
The coloring of utilization. You can set your personal preference on utilization coloring. For details, see Set your personal preference on heatmap coloring. |

|
Effort type Specifies how effort is measured. Click the down arrow to select the effort type: Hours, Person Days, or FTE (full time equivalents).
|

Filter data in the Demand tab
You can use the time period filter and filter panel to narrow down the information displayed in the team Demand tab.
You can use the time period filter () to display data of a specific time period.
To change the time period:
-
Click the down arrow.
-
Select the start and end period.
-
Click OK.
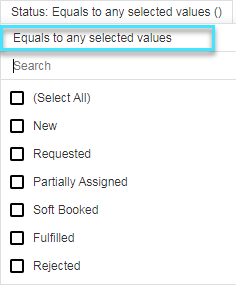
To set the advanced filter in the Demand tab:
-
In the upper-right corner, click the filter button (
) to open the filter panel. -
Click Add Filter.
-
Select the field to filter data by.

You can filter the data displayed in the Demand tab by position attributes: Resource Type, Role, Staffing Profile, and Status.
-
Select a filter condition, and select the filter values.
-
Click OK to apply the filter.
-
-
Repeat step 2 to add another filter.
Group data in the Demand tab
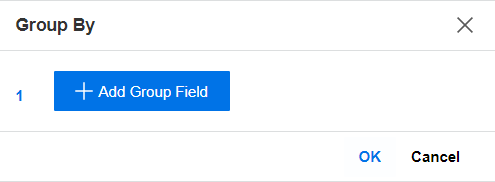
To group data displayed in the Demand tab:
-
In the upper-right corner, click the group icon (
). -
In the Group By window, click Add Group Field, and select a field to group data by.
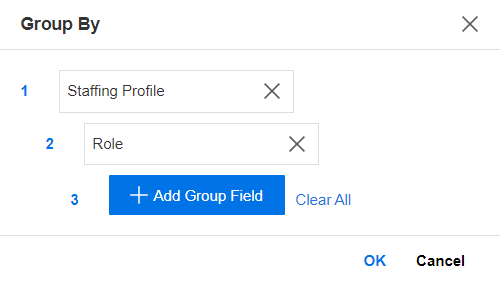
You can group data by position attributes: Resource Type, Role, Staffing Profile, and Status. Or, you can group demand by team.
-
If you want to add group-by field for the second level, continue to click Add Group Field and select another field.
You can add group-by fields for at most three levels.
To remove a group-by field, click the delete button. To remove all the group-by fields, click Clear All.
-
Click OK to save group-by fields.
Sort the team demand data
You can sort the data displayed in the team Demand tab by clicking a column header. A small vertical arrow is displayed in the column header currently used as the sorting criterion.
Manage team assignments
You can assign resources in your team and its subteams to staffing profile positions from the Demand tab. See Assign team resources for details.
Alternatively, you can assign teams in the staffing profile page. See Assign a team to staffing profile position.


