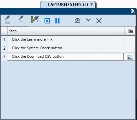
Captured Steps sidebar
This sidebar displays the steps that result from the user actions performed during your Steps Capture session.
| UI Example | 
Click thumbnail to view full size image. |
| To access |
In Plan Mode, click the Steps tab's Steps Capture button. You must have an application selected. If you have not defined an application, select Application Settings from the Steps Capture dropdown,
|
| Important information |
|
User interface elements are described below (unlabeled elements are shown in angle brackets):
|
UI Elements |
Description |
|---|---|

|
End Steps Capture Session. Ends the Steps Capture session and adds the captured steps to the Steps grid. |

|
|

|
Tools to manage the screen captures:
|

|
Delete Step. Deletes the selected step from the Steps grid. |

|
Multiple User Actions per Step. Instructs Sprinter to add all user actions to the last step. |

|
Single User Action per Step. Creates a new step for each user action. |

|
Start a New Step. Creates a new step to which Sprinter will add all future user actions. Note: This button is only relevant when Multiple User Actions per Step is enabled. |
| Steps Display area |
A grid representation of the steps showing: Step number. The sequential number of the step. Step. A textual description of the performed user action. When the Steps Capture session ends, this text is added by default to the step's description area. Alternatively, you can configure this to be added to the Step's Name field instead. For details, see Plan settings. You can also rename the step name. Capture. An icon
|


 icon.
icon. 
 indicating that there is a screen capture associated with the step. If no icon is present, the step has no screen capture.


