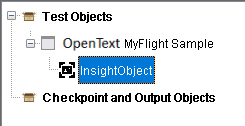
This exercise describes how to test with UFT One's Insight feature. Insight enables UFT One to identify an object in your app based on a captured snapshot of the app, instead of the object's description properties. This is useful when it is difficult to find an object with the standard attribute/value pair.
To identify Insight objects, you must add the test objects to the repository as Insight objects instead of using the relevant technology add-in.
Create a new test for Insight objects
Create a new test, where you can add Insight objects and steps to test. Tests and actions can contain a combination of Insight objects and objects added with standard object recognition.
This exercise requires only one action in the test, as well as the Login and FlightFinder object repositories.
To create the test:
-
If you've closed and opened UFT One, make sure you start it with the WPF Add-in loaded.
-
Click the New
 toolbar button drop-down arrow, and select New Test.
 -
Select GUI Test, and name your test Insight.
Select the default location, and leave the Solution Name field blank. This test is saved separately from the other tests in this tutorial.
Click Create to create your test.
-
Associate the Login and FlightFinder object repositories with your action.
-
In the Solution Explorer, right-click the Action1 node, and select Associate Repository with Action.
-
Browse to and select the TutorialObjectRepositories > Login.tsr object repository, and click Open.
The Login.tsr repository is added in the Solution Explorer, under the Action1 node.
-
Repeat the previous steps with the FlightFinder.tsr file. The FlightFinder.tsr repository is also added under the Action1 node.
-
- Save the test, and continue with Add an Insight object to the repository.
Add an Insight test object to the FlightFinder.tsr object repository to click the Order button.
To add an Insight object:
-
In the Solution Explorer, right-click the FlightFinder.tsr node, and select Open Repository.
-
In the Object Repository Manager, select File > Enable Editing.
-
Open the MyFlights GUI app, and log in.
For more details, see Flight GUI layer.
-
On the BOOK FLIGHT page, notice a changing ad at the bottom.

This ad is a good use case for Insight object identification, because the Order button inside the ad is not recognized as a separate WPF object.
For example, if you try to spy on the Order button itself, UFT One cannot identify it. For more details, see Spy on objects in the MyFlight application.
-
Back in the Object Repository Manager, click the Add Insight Object button
 .
. -
In the Select Learn Mode dialog that opens, click Automatic. This enables UFT One to automatically select a region or area in your app as an Insight object.
-
UFT One is minimized to enable you to select your object.
In the MyFlights app, click the Order button in the ad.
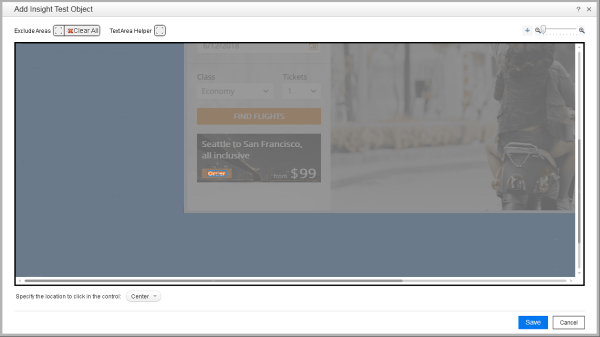
The area is captured in the Add Insight Test Object dialog, with the Order text automatically highlighted.
-
Drag the selection so that it includes the entire Order button, and not only the text.

Under the image, ensure that the Specify the location to click in the control > Center option is selected.
Click Save to add the object to the repository.

-
In the Object Repository Manager, in the Object Properties pane on the right, rename the object from InsightObject to PromotionOrder.
-
Confirm for yourself that UFT One can use the new Insight object to find the Order button.
Select the PromotionOrder Insight object, and click the Highlight in Application
 toolbar button. UFT One brings the MyFlight app to the front, and highlights the Order button in the ad.
 -
Save and close the object repository to return to UFT One.
-
Save your test, and continue with Add an Insight step to your test.
Add a step to test your new Insight object, and see how UFT One runs using Insight object identification.
To add an Insight step:
-
With the Insight test open in UFT One, and the Action1 action open in the Editor, add the same login steps you added to the original MyFlights test.
Copy and paste the following lines into the Editor:
Copy codeWpfWindow("OpenText MyFlight Sample").WpfEdit("agentName").Set "john"
WpfWindow("OpenText MyFlight Sample").WpfEdit("password").SetSecure "5b0bce2fd2c5fdd64271"
WpfWindow("OpenText MyFlight Sample").WpfButton("OK").ClickFor more details, see Add steps to the Login action.
-
Add a new step to click the PromotionOrder button.
Do this by dragging the object from the Toolbox pane, or by switching to the
 Keyword View and clicking ADD NEW STEP to select the object, or using the Step Generator.
For more details, see:
-
Select Record > Record and Run Settings.
In the Windows Applications tab, ensure that the Record and run only on: option is selected, with the FlightsGUI.exe app defined in the table below.
For more details, see Run your test.
-
Close all windows that are running the MyFlights GUI app.
-
In the toolbar, click
 Run.
Run. - In the Run dialog, ensure that the Insight test and the New run results folder options are selected.
- Click Run to run your test.
UFT One opens the MyFlight GUI app and runs the test steps as configured. When UFT One comes to the step where the Order button is clicked in the ad, it uses Insight to identify the button.
-
When the test run is complete, analyze the run results.
In the Test Flow, scroll down and click the PromotionOrder.Click step. Note the step details, which display the Order button that UFT One identified using Insight instead of the WPF Add-in.

 Next steps:


