
Share this page


OData support for reporting
You can access your workspace data using OData (Open Data Protocol), the OASIS REST-based standard for accessing data. You can use OData to generate reports and charts in reporting and business intelligence (BI) tools.
Supported OData versions
OData support has been tested with Power BI and Excel. Any tool that supports OData version is likely to work well.
Caution: Tableau’s support for OData is limited. For example, Tableau's OData support currently does not include the $expand interactive query argument, which is used extensively for cross entity reporting. Consider using a different reporting or business intelligence tool.
For OData version support, download and install the Microsoft Power Query for Excel add-in.
Prerequisites
Ensure the following prerequisites are met, before you begin to work with OData:
-
Request that the site admin or the space admin activate basic authentication with the SUPPORTS_BASIC_AUTHENTICATION configuration parameter for each space. For details, see SUPPORTS_BASIC_AUTHENTICATION.
Caution: Activating basic authentication enables other external systems to access data using this authentication method, not just OData.
-
When authentication is configured with SSO, configure OData integration using the API access keys. For details, see API access.
-
Ensure that Access OData permission is granted to the appropriate role. By default, permission is enabled, but if you have created custom roles, make sure this option is enabled. For details see General System Actions in Roles and permissions.
Server base URI
The OpenText Core Software Delivery Platform server base URI for accessing data using OData is:
<https://server>/odata/v4/shared_spaces/<space_ID>/workspaces/<workspace_ID>/
Note: If you do not receive a successful response to an OData consumer request, it might be because the base URI is different than expected. Consider modifying the ODATA_USE_SERVER_BASE_URL and SERVER_BASE_URL parameters. For details, see Configuration parameters.
Access data from multiple workspaces
You can access data from multiple workspaces that exist within a shared space by modifying the base URI to include the following.
| ID type | Details |
|---|---|
| Workspace ID |
A workspace whose ID is listed after /workspaces/ is considered the main workspace, and serves to provide metadata for the report, such as field names. |
| Cross-workspace ID | Workspaces whose IDs are listed after /cross-workspace/ are the source of data, and serve to provide the field values for the report. |
Using the modified URI, you can:
- Include data from all the workspaces within a shared space.
- Include data from specific workspaces within a shared space.
- Include data only from active workspaces
Note: You cannot include the data from workspaces that exist within an isolated space.
| Use case | Details |
|---|---|
| Include data from all workspaces |
To include the data from all the workspaces that exist within a shared space, enter an asterisk (*) after /cross_workspace/. For example: <https://server>/odata/v4/shared_spaces/<1001>/workspaces/<1002>/cross_workspace/* |
| Include data from specific workspaces |
When including the data from specific workspaces, consider the following:
Note: Private fields defined in specific workspaces are not included in cross-workspace reports. |
Authenticating
To work with OData, review the prerequisites for basic authentication under Prerequisites, and then authenticate with basic authentication.
You can authenticate with either:
-
Your user name and password.
-
An API access key.
For details, see Basic authentication.
Tip: When working with basic authentication, on each successful authentication, the LWSSO_COOKIE_KEY cookie is included in the response. We recommend that you send the LWSSO_COOKIE_KEY cookie with each subsequent OData request for enhanced performance. For details about the LWSSO_COOKIE_KEY, see Authentication.
Access data from a reporting or BI tool
Any reporting or business intelligence tool that supports OData is supported for integration, including Excel 2010 and later, Power BI, Power Query for Excel, and Power Pivot for Excel.
For a list of the tools that support OData, refer to the product documentation.
Example: Access data using Power BI
-
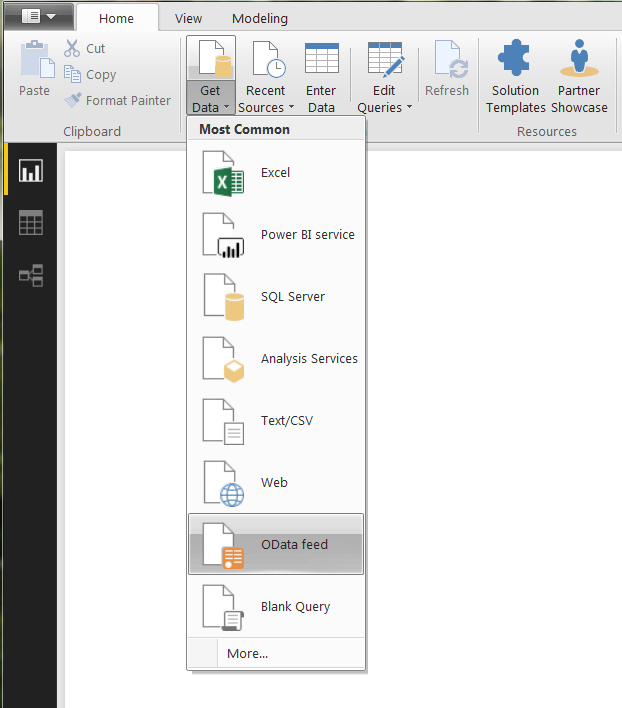
Choose Home > Get Data > OData Feed.
-
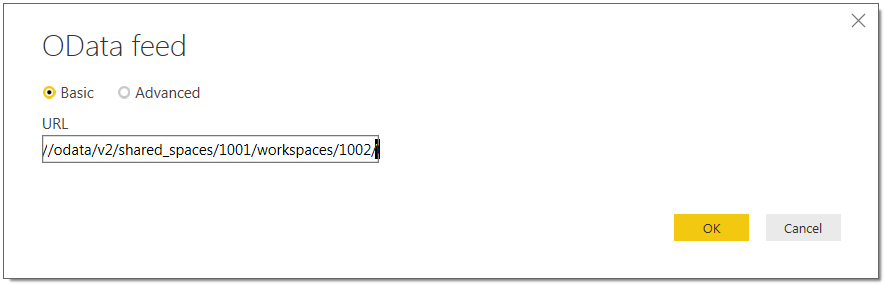
Enter the server base URI and click OK.
-
Under Basic, enter your user name and password.
Now you can see all entities in the Navigator.
Example: Access data using Excel
-
Choose DATA > From Other Sources > From OData Data Feed.
-
Enter the server base URI and click OK.
-
Select Use this name and password and enter the information.
Now you can see all entities.
To troubleshoot issues with Microsoft applications, see Troubleshooting.
Templates
-
For an Excel template that helps you create a feature quality status report using OData, see https://marketplace.opentext.com/appdelivery/content/odata-octane-excel-feature-quality-status-report.
-
For a Power BI template that you can deploy and import, see https://marketplace.opentext.com/appdelivery/content/power-bi-desktop-template-for-octane-odata.
Scenario: Traceability report
This example demonstrates how to use Power BI to access data using OData. It shows, step by step, how to create a traceability report.
-
In Power BI, set up the data feed for OpenText Core Software Delivery Platform with OData. For details, see Example: Access data using Power BI.
Set up a basic feed using the OpenText Core Software Delivery Platform URI.
Enter the user name and password for basic authentication and click Connect.
-
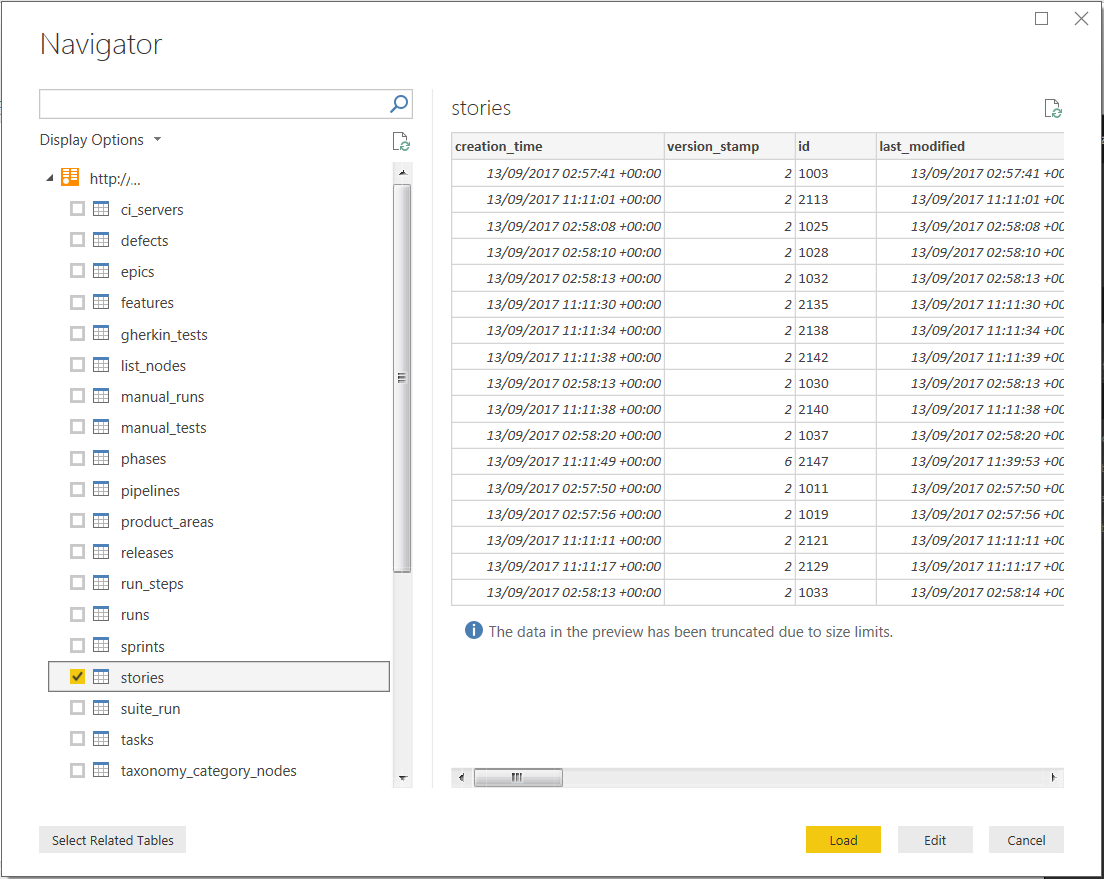
After connecting, you can see all OpenText Core Software Delivery Platform entities, and start creating a report.
To see only stories, select stories and then click Edit.
-
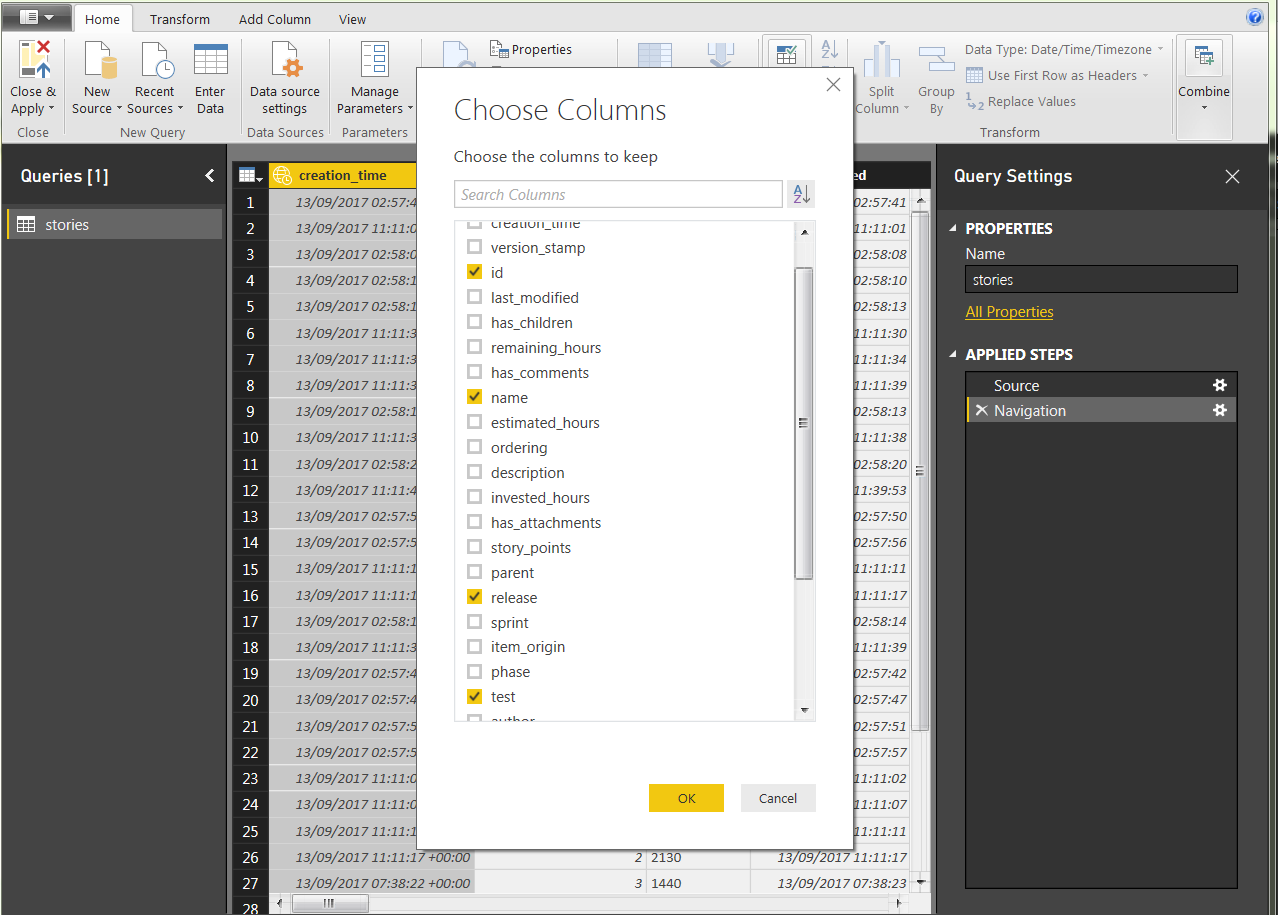
Next, click Choose Columns and select the columns that you want to see.
-
For example, select the ID, name, release, and tests columns.
Releases and tests are references to other entities. You can get more information about releases and tests by clicking on the right button for each column to expand them.
-
Click the button for the release. To get the name of the release, select name.
-
Similarly, click the button for tests, and then select the name and ID attributes.
-
You can filter for items in a specific release by selecting the release to filter. For example, Release 2.2.
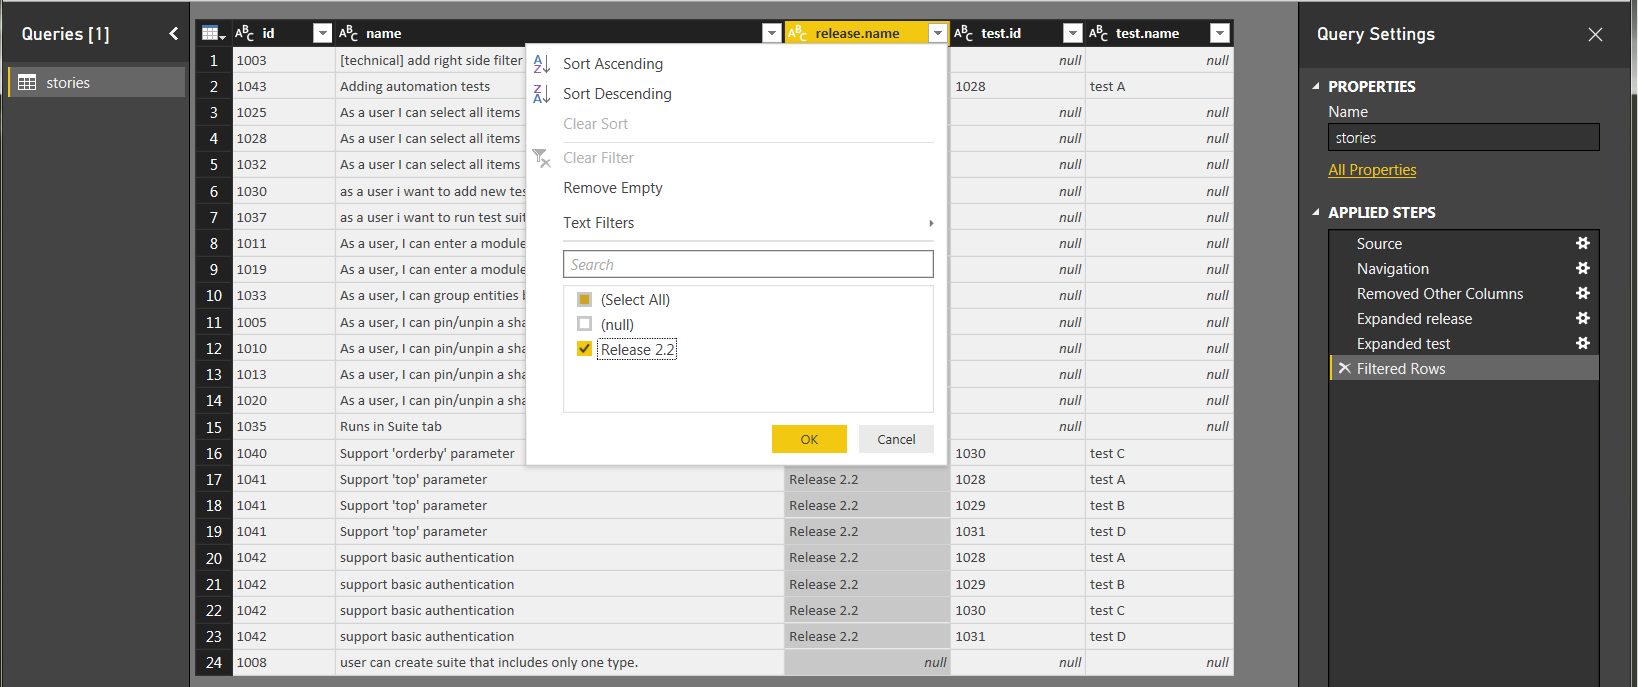
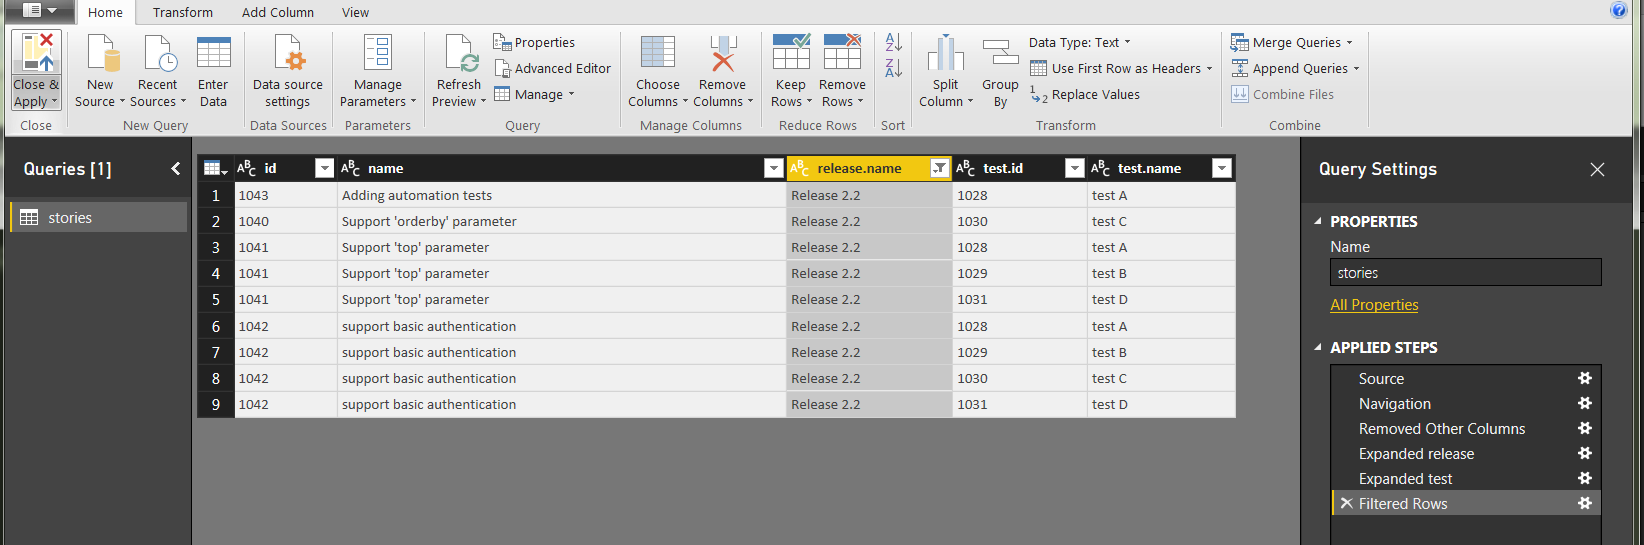
-
Click Close & Apply. Below are the results.
-
-
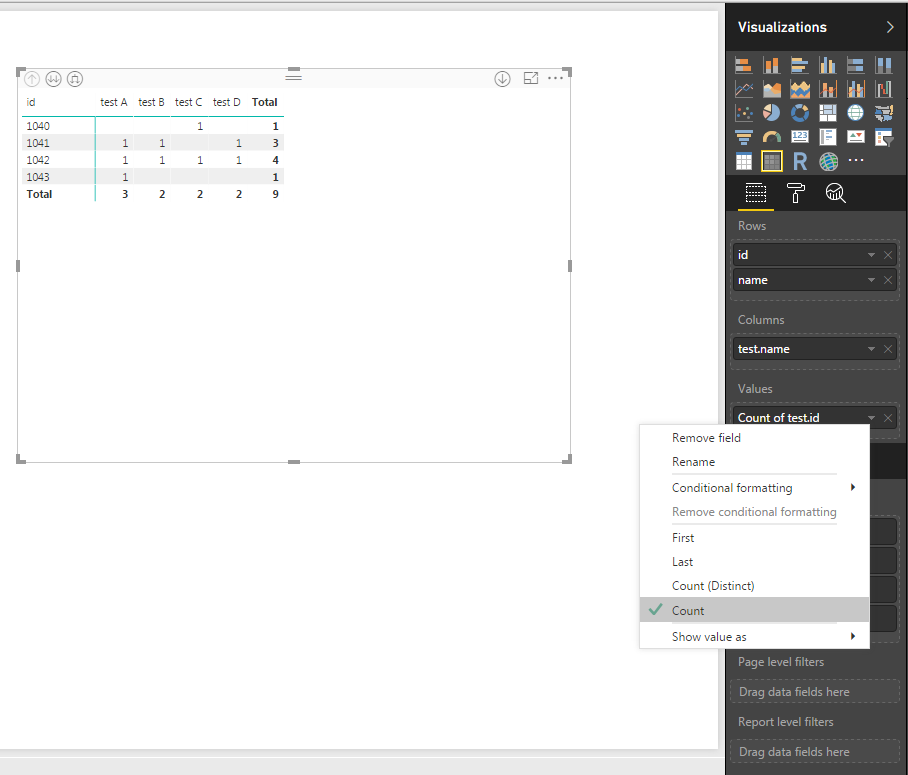
Create a graph with selected data.
In the Visualizations pane:
-
Select the values.
-
Select matrix visualizations.
-
Arrange the rows, columns and values.
-
You can also add the pie chart visualization.
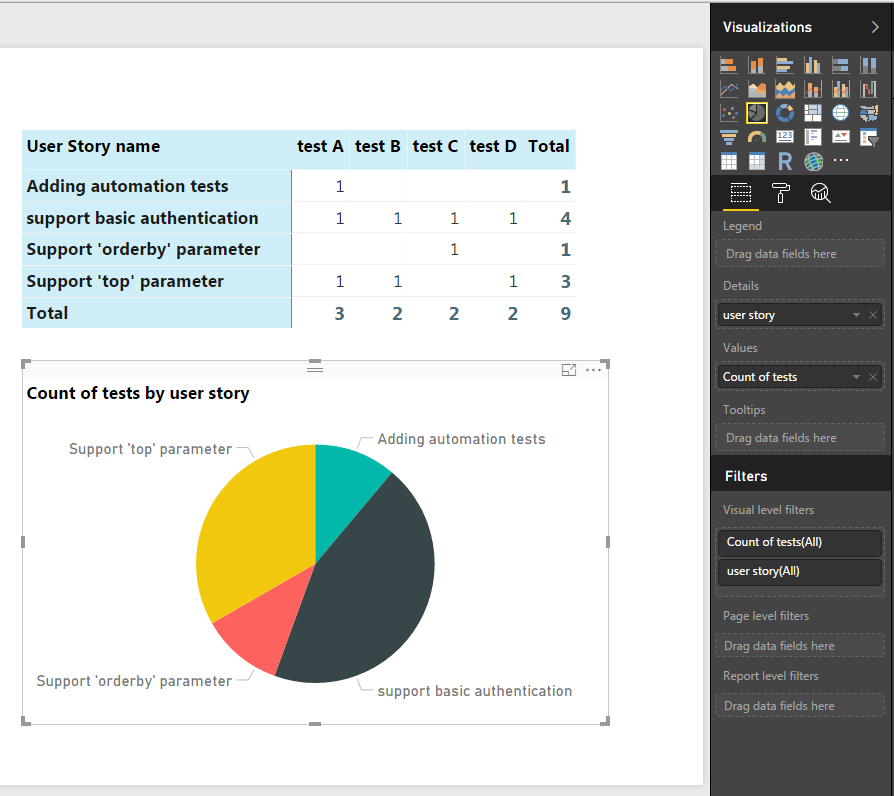
-
Save and refresh the data.
-
Troubleshooting
When trying to access data from a Microsoft application, a message similar to "The server has closed the remote connection" displays, due to a Microsoft environment issue.
Problem:
When using OData with a secure OpenText Core Software Delivery Platform server and Microsoft Excel (or other Microsoft applications, such as Power BI), this error appears. This is because, by default, the Microsoft application does not support TLS1.2.
Workaround:
-
Modify your registry using regedit.ext.
Set the SchUseStrongCrypto DWORD value in the following two registry keys to 1:
- "HKEY_LOCAL_MACHINE\SOFTWARE\Microsoft\.NETFramework\v4.0.30319"
- "HKEY_LOCAL_MACHINE\SOFTWARE\Wow6432Node\Microsoft\.NETFramework\v4.0.30319"
If these keys do not exist, create them.
- Restart the Microsoft application.


