Share this page


Record Native Mobile scripts


You can record a typical business process on a mobile device using the TruClient - Digital Lab integration. You interact with the device using a Virtual Network Computing (VNC) view inside the browser used by TruClient. The device is uniquely locked by you, so that no other user can interfere with your scripting. When you start recording, the application is installed on the device and launched. As you interact with it, TruClient steps are created.
Create a script and connect to a server
Before you begin recording, you create a TruClient - Native Mobile script in VuGen and connect to a Digital Lab server.
To create a script and connect to the server:
- Make sure you have prepared your system for Digital Lab integration, as described in Set up environment.
-
In VuGen, create a TruClient – Native Mobile script.
-
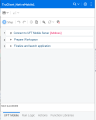
In the toolbar, click Develop Script. The TruClient window opens. Make sure the Digital Lab is selected in the bottom of the pane.
Tip: For all the arguments in the browser window, you can use parameters instead of actual values. Use the drop-down box in each argument field to indicate whether the text in the field is an actual value
 or a parameter
  . If you indicate a parameter, you define it separately in VuGen. For details, see Enhance TruClient - Native Mobile scripts.
 -
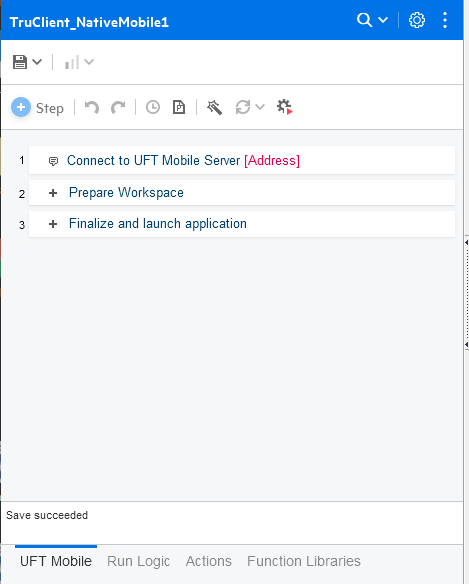
Expand the top section, Connect to Digital Lab Server.
Expand the Arguments section, and manually fill in the server information. If you have already entered the server information in the General Settings, it should appear in the fields. If you recently made changes in the TruClient General Settings dialog box, click the Import button to bring those settings into your script. For details on the settings, see TruClient General Settings for Digital Lab.
To specify a timeout for the connection to the server, other than the default value of 30 seconds, expand the Step section and specify a value.
-
Click the Connect button
 to establish a connection with the server. A check mark to the left of the section indicates success.

Choose a device and apps
Before recording your actions, you choose a device and one or more apps for your script. The applications are uploaded to the Digital Lab server (in .apk or .ipa format). When you start recording, the application is installed on the device and launched.
The Digital Lab wizard lets you select all of the items for your configuration flow, from a single window. For details, see the Digital Lab Help Center.
-
Choose a workspace.
Expand the Prepare Workspace section and select a workspace.
-
Open the wizard.
Expand the Select Device section, and click the Mobile Configuration wizard button
 . This wizard lets you configure the entire test flow. The Device tab opens. If you know your device's ID, you can enter it directly into the Arguments section, without opening the wizard.
 -
Choose a device.
You can select a device based on its capabilities or a specific device by its ID or name. The default selection method is Choose Capabilities.
-
In the default selection method, Choose Capabilities, select your requirements in the Create Rule page.
Tip: To quickly create a rule based on an existing device, click the Fill Capabilities button, visible when you hover over an active device.
(Devices on the Amazon Device Farm can only be selected by Capabilities.)
- To select a specific device, click the Choose Specific Device tab in the left pane and select a device.
-
-
Add applications.
If you only plan to test system apps or the Home screen, you do not need to install any apps and you can skip to the next step.
- Click the Apps tab, which is only available after you have selected a device. Select one or more apps. For details, see View, Upload, and Manage Apps in the Digital Lab Help Center.
- If you do not see the app you want to test in the Apps page, click the Upload app card to add it. When you upload an app, Digital Lab also creates a packaged version of the app with the libraries that are required for testing.
- Click Save and Close.
-
Fine tune your device settings.
- In the TruClient window, expand the Select device's Arguments node. Review the argument values. From the Source Lab dropdown, you can select your desired location, such as the default Digital Lab, a hosted device, or an Amazon device farm device. For details, see the Digital Lab Help Center.
- To replace a value with a parameter, click the drop-down arrow to the right of the field and select the Parameter icon . You can create a parameter from the right-click menu item Create new parameter from selection, or see Create parameters.
- If you are using parameters, click on the Parameter icon to open the Arguments Editor window. Enter values for the parameter, with each value on a separate line.
-
Fine tune your app settings.
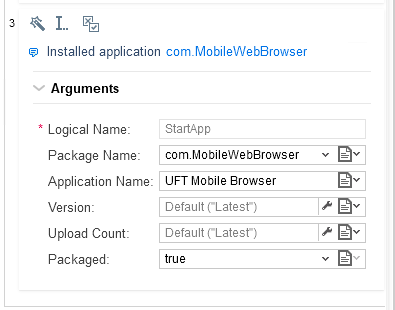
- In the TruClient window, expand the Install Applications section. The selected apps are listed.
-
Click on each application, and expand its Arguments node. Review the argument values. TruClient distinguishes between apps by their Logical names, so make sure all of your apps have unique names, To change a logical name, click the Rename icon
 .
.We recommend that you use the latest version and latest upload number for your app, to avoid incompatibility with new versions. To use these values, click the Use Default icon
 in the Version and Upload fields.
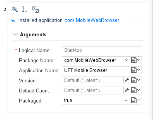
- To replace a value with a parameter, click the drop-down arrow to the right of the field and select the Parameter icon . In the Arguments Editor window, enter values for the parameter, with each value on a separate line.
-
Indicate if you want to use the packaged (instrumented) or non-packaged (default) version of the app.
- To exclude a specific app for this test, click the Enable/Disable during replay icon
 . This disables its loading during replay and helps conserve resources.
 - To delete an app from the list of installed apps, hover over it and select Delete from the right-click menu.
For detailed instructions, considerations, and limitations, see Lab console and App packaging and signing services in the Digital Lab Help Center.
Set the test options
Before launching the test, you set the test options: You specify which app opens at the beginning of the test - this can be the Home screen, a system app such as Calendar or Phone, or a non-system app that you installed in the previous section. You also indicate the device metrics that you would like to gather during the test replay.
To set the test options:
- In the Finalize and launch application section, click the expansion arrow adjacent to Launch Application.
- Click the wizard icon to open the Digital Lab wizard. In the wizard window, click the Test Options tab (only available after you have selected a device and app).
- Indicate what you would like to launch upon the start of the test: the Home screen, an installed app, or a system app. For System or Digital Lab apps, select an app from the drop-down list.
-
Indicate how to handle the installed apps: Install, Restart, or Uninstall for the test.
For actual replay, you can specify a different behavior for the first and subsequent iterations. To set your preferences globally, see Set up environment. To set the replay preferences for this test only, see Runtime settings.
-
Indicate the device metrics that you would like to gather during the test replay. Select Log if you want to generate a device log. To download the log, click the Download Log button in the remote view's control panel, available only during recording. For details, see Device control panel in the Digital Lab Help Center.
Note: You can also select the metrics globally in the TruClient General Settings for Digital Lab.
- Click Save and Close.
- To review your settings, expand the Launch application's Arguments node, to open the Step editor.
- Click the Save button in the TruClient browser.
Execute the flow and record a script
To register all of your choices and prepare for a recording, you must send the Digital Lab configuration to TruClient, using the Execute configuration flow button. Then, you record the script.
To send the Digital Lab configuration and record a script:
-
Click the Execute configuration flow button
 on the TruClient toolbar. A check mark is displayed next to each of the sections as their values are verified. In the right pane, TruClient shows a remote view of your device and launches the app that you selected.
 - When you execute this flow, the device is locked on the Digital Lab server for your use.
- If for some reason, you get disconnected from the server, or if your device reservation has ended, execute the configuration flow again.
Note: If you allocated your devices from an Amazon Device Farm, this command is not able to register devices and apps. To monitor the integration with AWS, run it in VuGen or from the LoadRunner Controller.
-
In the TruClient window's Actions tab, click Record.
Tip: To restart or reinstall the app before you start recording, select the relevant option from the
 menu in the TruClient toolbar. This can be helpful, for example, to reset the app, or if you want to start recording from the app's opening screen.
 -
Interact with the mobile device in the remote access window. As you perform actions, TruClient records the operations, and steps are added to the script.
- In the Device Interactions section:
- Use the Change orientation button to change the orientation of the device.
- Use the Take Screenshot button to download a screenshot of the current screen to your local machine.
- To send text to the device, click the Send text button.
- Expand the Simulations section, and add simulated events such as Simulate incoming call, Simulate incoming SMS, and Simulate sending app to background.
For more information about the available interactions and simulations, see Device control panel in the Digital Lab Help Center.
Note: If the remote access window fails to show the completion of an action on the device, for example, due to a network delay, TruClient still continues to record steps that you perform on the device itself.
- In the Device Interactions section:
-
When you have finished recording your test, click Stop in the Actions tab.
 See also: