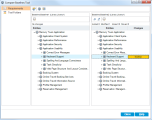
This task describes how to work with libraries and baselines.
To learn more about libraries and baselines, see Libraries Overview.
ALM Editions:Quality Center Enterprise Edition does not include all Libraries module functionality. For information about ALM editions and their functionality, see ALM editions. To find out which edition of ALM you are using, ask your ALM site administrator.
-
Define a hierarchical framework for your libraries by creating a libraries tree that can contain folders and subfolders.
-
Open the Libraries module. On the ALM sidebar, under Management, select Libraries.
-
Create folders. Right-click the Libraries root folder and select New Folder. To create a sub-folder, right-click a folder and select New Folder.
-
Add libraries to folders. Right-click a folder and select Create Library. In the New Library dialog box, fill in fields on the Details page. For user interface details, see New Library/Library Details Dialog Box.
On the content page, select entities to include in the library. For user interface details, see Content Tab.
You can define a filter to help you select the entities that you want to include. This can be useful, for example, if you want to create a library that is not based solely on the hierarchical structure of your project.
Example:
Jim, the project manager, has a new project with a major security impact. The test plan tree in his project is organized hierarchically based on products and versions. Jim creates a library that includes the relevant test folders, and defines a filter for the library to include only security-related tests in those folders.
Note: In order to maintain optimal performance, the number of entities that a library can contain is limited. You can change the default values by setting the LIBRARY_FUSE and REQUIREMENTS_LIBRARY_FUSE parameters in the Site Configuration tab in Site Administration. For details, see Set configuration parameters.
-
-
Create a baseline for a library to track changes made to entities in your project over time.
-
In the Libraries module, right-click a library and select Create Baseline. For user interface details, see Create Baseline Wizard.
-
Click the View Log button in the Details tab. The Log: Create Baseline dialog box opens and displays progress.
-
Click the Refresh button on the module toolbar to refresh the display. The baseline details are displayed in the Details tab. For details on the available fields in the Details tab, see Libraries Module Fields.
Note: When the process is complete, view the log before refreshing the display. If you refresh the display after the baseline is created, the View Log button is no longer displayed, and you cannot view the log.
For user interface details on the Libraries module window, see Libraries Module Window.
-
-
(Optional) Monitor library tasks.
When you create a baseline, ALM performs the task in the background, enabling you to continue working in ALM while the process is running. You can view the status and progress of all asynchronous tasks run for the project using the Task Manager.
On the ALM masthead, click
 and select Task Manager. For user interface details, see Task Manager.
 -
Compare two baselines in a library, or compare a baseline to the current entities in the library.
-
In the Libraries module, right-click a baseline, click Compare To, and choose one of the following:
-
Select Baseline. Compares the baseline you selected with another baseline in the library. Opens the Select Baseline dialog box. Click the browse button to select a baseline from the list.
-
Current Entities. Compares the baseline you selected with the current entities in the library.
For user interface details on the Compare Baselines Tool, see Compare Baselines Tool Dialog Box.
-
-
To save the baseline comparison results in .csv file format, click the Export Comparison Results button
 . After saving, the file opens in the default application defined for opening .csv files on your computer, such as Microsoft Excel.
-
-
You can pin a test set to a baseline to associate the test set with the versions of the tests stored in the baseline you select.
-
In the Test Lab module, right-click a test set and select Pin to Baseline.
-
To clear a pinned baseline, right-click a test set and select Clear Pinned Baseline.
For concept details on pinned test sets, see Pinned Test Sets.
-
-
View and compare all versions of an entity that are stored in a baseline.
Note: Available from the following modules: Requirements, Business Components, Test Plan, Test Resources.
Select an entity in the tree or grid, and click History tab > Baselines tab.
For user interface details on the Baselines tab, see Baselines Tab.
-
Import a library to reuse an existing set of entities within a project or across multiple projects. As development continues, compare and synchronize libraries. For task details, see How to Share Libraries.


