Share this page


Build the backlog
The first step in the development process is building and prioritizing the backlog. Use the Backlog module to perform this work.
Create the backlog
You can create a backlog in ALM Octane either by entering items in the ALM Octane UI, or by importing items from an Excel spreadsheet.
Follow the procedure below to create backlog items in the ALM Octane UI, or see Import from Excel to import your backlog from an Excel file.
To create a backlog item:
-
Open the Backlog module, and select either the Epics, Features, or Backlog Items tab.
-
Click + Add and select the item that you want to create: epic, feature, user story, or quality story.
A shared space admin can create shared epics
 . For details, see Shared epics.
 -
Define the available fields. You can also click Customize fields
 to add or remove fields from the form. For details, see Forms and templates.
Define the following optional fields:
Field Details Program Enterprise Edition: Associate the item with a program.
Add the Program field to the form and select the program. For details about programs, see Programs.
Team Assign an item to a team.
If you already set the Program field, you can select from teams that are associated with the same program, or teams with no program association.
- Optional. Use the Autofill feature to populate new backlog items with sets of predefined values. For details, see Build the backlog.
-
Optional. Create tasks for a user story in the Tasks to generate field.
If necessary, you can change a backlog item's parent.
To change an item's parent:
- Drag the item to a different node in the tree.
- Edit the item's Feature or Epic field.
Note: Stories and features that are not associated with a feature or epic are children of the root Backlog node. To view these items in the grid, select the root Backlog node, and open the User Stories or Features grid.

Assign test coverage to backlog items
You can track the quality of features and stories by analyzing the status of the tests covering those items.
One test can cover many backlog items, and one backlog item can be covered by many tests.
To define test coverage for a backlog item, do one of the following:
- In the Relations tab of a backlog item, link the defect to its covering test.
- In the Relations tab of a test, link the test to its covered backlog item.
The covered backlog item is listed in the test's Backlog Coverage field.
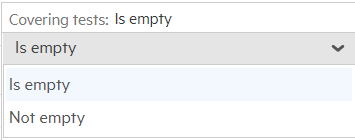
The covering tests are listed in the backlog item's Test Coverage field. The field represents the tests that cover a backlog item, grouped by their various statuses.
Tip: You can filter features and stories according to whether or not they have covering tests:
Set fixed ranking
Architects or PMs can use ranking at the start of a release. Each team can then align their development priorities based on the ranking of the backlog items they are assigned with.
You can set fixed ranking for backlog items by different fields, either system or user-defined fields. This ranking method helps you preserve the ranks when items in the grid are grouped, sorted, or filtered by any other fields. For details on user-defined fields, see Custom fields.
Note:
- For the ranking purpose, you can only use fields that are editable and of integer type. You can not use this method to rank items by the Rank field, regardless of the fact that the field is editable and integer.
- Admins can use business rules to prevent ranking by specific fields, for example, by making the fields read-only. For details, see Business rules.
Prerequisites
To set fixed item ranks, ensure the following prerequisites are met:
- The logical name of the field by which you want to rank items should be defined in the WORK_ITEM_FIELDS_ENABLED_FOR_SEQUENTIAL_RANKING parameter. For example, fixed_rank_udf. For details, see Configuration parameters.
- Ensure that you have permissions to edit work items for which you need to set fixed ranks.
- The field by which you want to rank items should exist for the given item type. For example, if the field was created for defects only, you cannot rank user stories by this field.
- Items in the grid should not be grouped by any field.
- Items in the grid should be ordered in the way you want the items to be ranked.
- The field by which you want to rank items should be added as a column to the items grid.
To set fixed ranking by a specific field:
- In the grid view, select work items that you want to rank.
Ensure that the necessary field exists for all the selected item types. You can also filter the grid to display only those item types for which the field exists.
- Click More > Set Sequential Ranking, or right-click in the grid and select Set Sequential Ranking.
If the Set Sequential Ranking option is not available, ensure that all the prerequisites are met.
- In the Set Sequential Ranking dialog box, enter the following fields:
- Click OK.
| Field | Details |
|---|---|
| Select field |
Lists fields that were defined in the WORK_ITEM_FIELDS_ENABLED_FOR_SEQUENTIAL_RANKING parameter. Note: You can select from fields that exist only for the given item type. If the parameter includes only one field that exists for the given item type, the field value is autopopulated. |
| Start value | Determines the starting point for the ranking sequence. The start value should be greater than 0, for example 1. |
| Increment | Determines the amount by which the ranking value increases. The increment range is from 1 to 1000. For example, if the ranking sequence should be 1, 2, 3, 4, 5..., set 1 for the increment. |
Note: The selected values are saved in user settings. Next time you open the Set Sequential Ranking dialog box, the fields are autopopulated with the values you last used.
The items are ranked by the field specified in the dedicated parameter. The field name is displayed in the item details.
After setting fixed ranks for backlog items, you can:
| Action | Details |
|---|---|
| Track ranking | An item's History tab displays all the details about the ranking operation: the date, ID of the user who performed the action, as well as the action details. |
| Add new items to the grid |
New items are added to the top of the grid with no rank. You can manually rank the item by clicking in the empty cell and entering the rank value. The rank value can vary depending on an item's priority. To rank items in the grid sequentially again, click the header of the ranking field column. |
| Group items in the grid | When you group sequentially ranked items by any field, the original ranking is preserved, and it is no longer sequential. |
Set relative ranking
When ranked by the Rank field, backlog items in ALM Octane do not have a fixed rank number. Instead, in any given grid, items are listed by order of their relative ranking, and are numbered sequentially from 1 to [no. of items in the grid]. New items are added to the backlog with the lowest rank.
Tip: Even if backlog items are associated with different programs, you can still rank them together.
When setting the relative ranking, consider the following points:
| Points | Details |
|---|---|
| Always sequential | Items in the grid are ranked sequentially. If a team lead ranks ten features of a release from 1 to 10, and then divides them between the developers, developer A sees 1,2,3 reflecting the ranking of their features, developer B sees their features as 1,2,3, and developer C sees theirs ranked as 1,2,3,4. |
| Does not change from grid to grid |
Ranking is across all of ALM Octane. For example, FAs and PMs can add items to a release in order to control which items are ranked in the release backlog, and this change is across all of ALM Octane. |
| Editable |
You can change an item's rank by changing the item's order in the grid. And vice versa, changing an item's order in the grid also changes the item's rank. Note: You cannot clear ranking for separate items in the grid. |
| Role-based | You need to have permissions to change an item's rank. |
Note:
- Ranking by the Rank field is not available for grouped items.
- Item rank disappears when items in the grid are sorted or filtered by any other fields.
To set relative ranking by the Rank field:
-
Click the Rank column header to sort the grid by rank.
-
Use the following methods to change ranking:
- Drag one or more items up or down the Grid View or Smart List View.
- Click the rank number and type in a new value.
- Right-click an item and select Rank Highest or Rank Lowest.
Set ranking with WSJF attributes
The WSJF formula is a well-established method for determining epic and feature priorities. It uses parameters and a calculated measurement to determine an WSJF score for an item.
In the feature or epic details, set the value of WSJF-specific fields:
| WSJF fields | |
|---|---|
| Business Value | The item's value to customers or the business. For example, how the epic or feature affects revenue. |
| Time Criticality | The urgency to deliver the epic or feature. |
| RR | OE | The epic or feature's value in eliminating risks or creating new opportunities. |
| Calculated measurements | |
| Cost of delay |
The difference between an epic or a feature being available now or later. The Cost of Delay is the sum of the above components: Cost of Delay = Business Value + Time Criticality + RR | OE |
| Job size | The estimated length of time needed to finish the epic or feature. You measure this using your own unit (for example: hours or story points). |
| WSJF Score |
The ratio of the cost of delay and the job size. The higher is the WSJF score, the higher is the priority of the epic or feature. WSJF Score = Cost of Delay / Job Size OR |
For the WSJF fields (Business Value, Time Criticality, and RR | OE), select a value from the list. For the Job Size measurement, enter any integer value.
Define epic business values
You can track epics' perceived and actual business values. This helps you prioritize epics based on the value they deliver, and determine the gap between the initial and final estimation of an epic.
Epic value definition
An epic value is based on several factors, such as customer value, commercial value, market value, efficiency value, and future value.
The epic value definition depends on the methodology adopted by the product team, and may vary across teams.
In ALM Octane, you can define an epic value in two stages:
| Value | Description |
|---|---|
| Perceived value |
The epic initial value estimation that helps prioritize the epic relative to others. The perceived value is estimated by the product team when creating an epic and determining its business priority. Tip: The perceived value score should justify an epic's priority over other epics. |
| Actual value |
The epic true value, as concluded after the epic’s implementation and delivery. The actual value score is calculated by the product team to track the value gap for different epics over time. Note: Define the actual value in the epic details after the epic’s implementation. |
After the epic actual value is defined, ALM Octane automatically calculates the value gap. The value gap is the difference between the perceived and actual values of an epic.
- You can edit the perceived and actual value scores in any phase of an epic. The value gap is automatically recalculated.
- You can use decimal numbers for value scores.
- Your admin can set the minimum and maximum value scores with the help of a business rule. For example: The perceived value field should be between 1 and 100. For details, see Design business rules.
Note:
Create dependencies
For details on adding dependencies, see Connected items.
Track aged backlog items
ALM Octane provides a way to track backlog items that remained in the same phase for an extended period of time. This tracking indicates which backlog items were not handled for an extended period of time, or that got stuck in a certain phase. This can reveal bottlenecks and wasted time in the development process.
To track these items, use the Days in phase read-only field, which shows the number of days that the backlog item remained in the same phase. You can add it into a grid as a column, use it in a filter, and sort the entities by this value.
Tip: You can also specify the Days in phase in dashboard graphs. For example, if you only want to show defects that had a phase age of 60 days or more, add a Days in phase filter and specify Greater than 60. For details, see Configure widget data settings.
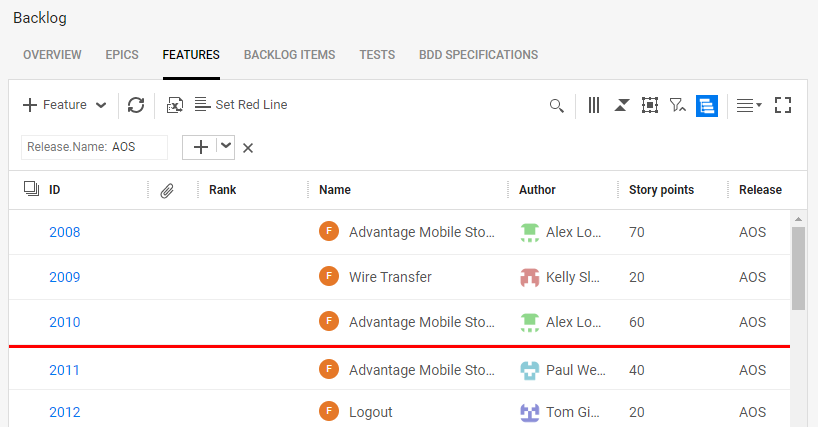
Set a red line
When working in the Backlog module's Features tab, you can add a red line to delineate a specific number of items or story points. For example, you can instruct ALM Octane to delineate 4 items that you plan to work on in the next few hours.
This allows you to view your goals and progress without having to add filters.
To add a red line:
- In the Backlog module's Features tab, open the Grid or Slim Grid view.
- Click Set Red Line.
-
Move the Show Red Line toggle to On.
- Select what you want to delineate: Story points or Items.
- Set the number of story points or items and click Set.
- To modify your settings, click Set Red Line or choose More > Set Red Line. You can only display one red line at a time.
-
Optionally:
- Apply filters to show items for a specific milestone, sprint, or release. Click Show filter pane
 . Click + Add Filter and choose the desired time frame.
 - Save your red line placement as a favorite. For details, see Grids.
- Apply filters to show items for a specific milestone, sprint, or release. Click Show filter pane
To remove a red line:
- In the Backlog module's Features tab, open the Grid or Slim Grid view.
- Click Set Red Line.
-
Move the Show Red Line toggle to Off.
Update multiple backlog items
When working in the Backlog module, you may want to update a common attribute of many items.
To update multiple backlog items:
-
In the Grid View or Smart List View, do one of the following:
-
Select the items you want to update in the grid.
-
Click the Select All check box on the left side of the grid to update up to 5000 items.
-
-
Right-click in the selected group area and click Bulk Update.
-
In the Bulk Update dialog box, select up to 10 fields.
You can choose to add to existing values, replace existing values, or remove existing values of multi-selection fields by clicking the dropdown menu.
-
Click Update to apply the changes.
Some fields cannot be updated with Bulk Update, including user-defined fields.
 Next steps: