Share this page


Create and manage connections
A connection represents the relationship between two data sources. This topic describes how to create and manage your connections.
About connections
You use a connection:
- To identify the data source whose assets you plan to synchronize.
- To specify the asset types, fields, and relationships you want to synchronize.
- To specify the projects you want to synchronize.
You perform these tasks using the Connection Wizard.
Micro Focus Connect creates an item when it encounters an item from either data source that it hasn't seen before (based on ID). An item is only created if the default mapping for the type is either bi-directional or in the direction of the item to be created. An item is not created if the data source for the side where the item is to be created has the Allow Create property for the type being created set to FALSE.
When Micro Focus Connect creates items, it uses all of the field mappings regardless of direction of the mapping to populate the newly created item.
Connection considerations
Caution: To ensure a successful synchronization, the date and time on all endpoint machines or systems must match.
- The data sources you want to use for a connection must exist before you can complete a connection. For details, see Create a data source.
- You can delete a connection only if there are no project maps or type maps defined for the connection or if you have not run a successful synchronization.
- Micro Focus Connect provides a helper tool that allows you to force-delete specific connections. For details see the DeleteConnection script in Batch utility scripts.
-
Two connections referencing the same source or target endpoint can (and should) share the same data source.
-
A single connection synchronizing data across two projects on the same server endpoint must use different data sources, even though both data sources reference the exact same endpoint.
-
You can use batch utility scripts to start, stop, and merge connections. For details, see Connection scripts.

Define a connection
This section describes how to define a new connection.
To define a connection:
-
From the Connections tab on the dashboard, click the + Connection button. The Create Connection Wizard opens.
Use the Data Source, Types and Fields, and Projects and Rules tabs to define a connection. Click the Next and Previous buttons to navigate between the tabs.
-
Set fields in the Data Source tab:
Field Description Connection Name Enter a name by which to identify the connection. We recommend not using whitespaces in the connection name. If you do need to use whitespaces, enclose the entire name with double quotes. Master Data Source Select a data source to use as the master data source.
You must select a Micro Focus product as the master data source.
The "master" designation is used as a last resort solution for resolving data conflict. For details, see Conflict resolution.
Target Data Source Select a Data Source to use as the target data source. Error Notification Optionally, use the fields in the Error Notification section to override global error notification email settings specified in Settings. For details, see Set up global error notifications. Sync Settings In the Synchronization Frequency box, set the interval between synchronizations.
Note:
- Setting a low frequency value creates additional load on the data source product servers.
- If the data sources are rate limited (typical in cloud instances), you may experience issues or slowdown in synchronization iterations.
Manage connections
Use the Modify Connection button to access the actions menu for managing your connections.
To access a connection’s actions menu:
- Navigate to the Connections tab and select the connection you want to manage.
- Click the cogwheel-shaped button
 , Modify Connection to open the action menu for the selected connection. The button is located to the left of the connection name.
The following connection menu actions are available:
| Action | Description |
|---|---|
| Edit | Opens the Update Connection: <Connection name> wizard to the Data Source page. Move between the pages using the Next and Previous buttons. For details, see Define a connection. |
| Update Labels | Refreshes the field labels for projects in the current connection. |
| Delete | Removes the current connection. This option is only available to the user who created the connection. |
| Clear Water Marks |
Resets watermarks for the current connection. Micro Focus Connect adds watermarks to connections to serve as a time and place marker. For details, see Reset watermarks. For details on how to clear watermarks for all active connections using a batch utility, see ClearWaterMarks. |
| Import Cross References | Allows you to select a cross reference file to import into your connection. For details, see Manage cross references. |
| Export Cross References | Exports the connection's cross reference file in XML format to your Downloads folder. For details, see Manage cross references. |
| Export Cross Reference Template | Saves a cross reference template file in XML format, to your Downloads folder. For details, see Cross reference file format. |
| Run One Iteration | Begins running a iteration for the current connection. Track the progress of the run in the Connection tab's dashboard's Status column, for example, Initializing or Running. |
| Start/Stop Connection | Starts or stops a connection. For details, see Start and stop connections. |
| Purge Connection Activity | Deletes all iteration data that is more than one month old, from the Micro Focus Connectdatabase. For details, see Purge scripts in Batch utility scripts. |
Clone a connection
You can clone an existing connection in order to facilitate the creation of a new connection. After you clone a connection, you can edit its details to reflect the new connection.
To clone a connection:
-
Click the Actions button
 in the Connect dialog box, and select
Export. The
Export Connect Data dialog box opens.
in the Connect dialog box, and select
Export. The
Export Connect Data dialog box opens.
- In the Connections tab, select a connection and click Export. A file named Connect.xml is saved to your Downloads folder.
- Open the Connect.xml file for editing and in line 24, modify the connection name. In the above example, change
<name>ALMV1Defects</name>to<name>ALMV1DefectsNewName</name>. - Save the Connect.xml file.
-
Click the Actions button
in the Connect dialog box, and select
Import. The
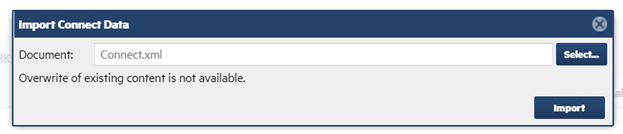
Import Connect Data dialog box opens. -
Click Select to locate the Connect.xml file. Then click Import. The import begins.
Caution: It is strongly recommended that you stop all running connections before importing cross reference data or a connection.
When the import completes, you have a new connection with all of the type and project mappings cloned from the original connection.
- Edit the new connection as desired. For example, change projects, types, mappings, synchronization criteria, and calculated values..
Move a connection
This section describes how to move a running connection from one Micro Focus Connect instance to another.
To move a connection:
-
Click the Actions button
in the Connect dialog box, and select
Export. The
Export Connect Data dialog box opens.
- In the Connections tab, select a connection and click Export. A file named Connect.xml is saved to your Downloads folder.
- Open the Connect.xml file for editing.
-
Optionally, modify line 29 with a different connection name, if you want to use a new name to distinguish between the connections.
<name>Connection name</name> -
Modify lines 30, 31 with the data source names on the new Micro Focus Connect machine, if they are different.
<source>source data source name</source><target>target data source</target> - Save the Connect.xml file.
- Stop the running connection on the old machine and disable it.
- Export the cross references for the old connection. For details, see Manage cross references.
- Stop all connections on the target server machine, but keep the Micro Focus Connect server instance running.
-
Click the Actions button
in the Connect dialog box, and select
Import. The
Import Connect Data dialog box opens. -
Click Select to locate the Connect.xml file that you created earlier. Then click Import. The import begins.
- Copy the crossreferences.xml file to the target machine, to the usermaps folder.
-
Edit lines 8 and 9 in the Importxrefs script:
set CROSS_REFERENCE_FILE=NameOfTheCrossReferenceFile.xmlset CONNECTIONNAME=NameOfTheConnection - Save the Importxrefs script and run it is an administrator.
- After the Micro Focus Connect initiates, export the cross references from the new machine. Verify that they match the original cross references. For details, see Manage cross references.
- Restart all the connections. Verify that the connection that you created on the target machine is functional.
- Delete the old disabled connection from the original source machine.
Conflict resolution
Micro Focus Connect uses several levels of information in the products to detect changes, and to determine which side made a change most recently. In the rare case where this information is insufficient to determine which side's changes should be applied, Micro Focus Connect resorts to the master data source. Most products provide sufficient details, making the designation almost redundant.
For data sources that do not merge content, the master designation determines which connector changes are applied when changes are detected in both data sources.
 Next steps: