
Share this page


Manage agents
This topic provides an overview of agents and explains how to configure them through the Deployment Automation user interface.
About agents
Agents are physical resources for deployment. To run a deployment, you must install an agent on the target server. Typically, you install an agent in every environment that an application passes through.
An agent is a lightweight process that runs on a target server and communicates with the Deployment Automation server. Agents are integral to the client/server architecture. They perform the actual work of deploying components, relieving the server from this task and making deployments of thousands of targets possible.
Process requests, such as deployments, are orchestrated by the server and performed by agents distributed throughout the network. Server-agent communication is built around transferring, or deploying, components.
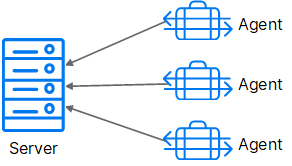
The following diagram demonstrates basic server-agent communication.
For more details, see Agent communication.

Agents page overview
After you install an agent and establish communication between the server and agent, you can configure many of the agent's features in the Deployment Automation user interface.
To work with agents, navigate to Management > Resources and select the Agents tab.
Agent configuration consists of assigning an agent to at least one environment. If you assign an agent to multiple environments, it performs work on behalf of all of them.
Note: You can also change agent properties directly on the agent machine. To do that, edit the agent's conf/agent/installed.properties file and restart the agent.
The following table provides a description of the tasks you can perform on the Agents page:
| Task | Description |
|---|---|
| View agent details |
View the following information about an agent:
|
| Edit | To change an agent's description and impersonation settings, click the Edit icon next to the agent. You can also specify an internal agent name that is resolved dynamically to a regular agent name. The server updates the agent name with the internal agent name that you specified. For details, see Dynamically register agents. |
| Restart | To stop and restart an agent, click the Restart icon next to the agent. While the agent is stopped, its status is Offline. |
| Upgrade | To upgrade an agent and its JRE, click the Upgrade icon next to the agent. For details, see Upgrade agents. The systems stops the agent before starting the upgrade, and the agent's status becomes Offline. After the upgrade is complete, the agent is restarted. Before it's back Online, the status might briefly be Connected. |
| Test connectivity | To run an agent settings and connection test, click the Test icon next to the agent. View the results in the Connection Test dialog box. |
| Inactivate | To deactivate an agent, click the Inactivate icon next to the agent. Deactivated agents cannot perform
deployments. To re-activate the agent, click the Show Inactive button, and then click the Activate icon next to the agent. |
| Remove | To remove an agent, click the Remove icon. |
Clicking the name of an agent opens the selected agent's page where you can:
- Edit the agent.
- View the resources inventory.
- View and download the upgrade log.
- Add or edit properties one by one or in a batch.
- View permissions and define security roles for the agent. For details, see Set role membership by product area.
Assign notification schemes to agents
To send email notifications to appropriate personnel when agents go offline, you can set up and assign notification schemes to specific agents.
For details on notification schemes, see Configure email notifications.
To assign a notification scheme to an agent:
-
Navigate to Management > Resources > Agents.
-
Click the Edit icon next to the agent for which you want to send notifications.
- In the Notification Scheme field, select the scheme you configured for this purpose.
- Click Save.
(UNIX) Install agents remotely
You can install an agent on a UNIX machine through the user interface. A remotely installed agent cannot be installed as a service.
To install an agent remotely:
-
Navigate to Management > Resources > Agents.
-
Click Install Agent. The Install New Agent dialog box opens.
-
Enter the installation details:
Field Description Target Hosts Host names or IP addresses of the machines on which to install the agent. SSH Port Secure Shell (SSH) port addresses of the machines on which to install the agent. Username SSH username used on the machines on which to install the agent. Use Public Key Authentication Select this option to use public key authentication instead of a password. SSH Password SSH password associated with the username for the agent machines. Agent Name Name of the agent. Agent Dir Directory where to install the agent. Java Home Path Path to Java on the agent machine. Temp Dir Path Path to the directory used to perform the installation on the target machine. Server Host Host name or IP address of the Deployment Automation server or agent relay to connect the agent to. Server Port Deployment Automation server port (7918) or agent relay (7916) to connect the agent to. Mutual Auth Select this option if you want the agent to enforce certificate validation for mutual authentication. Proxy Host Host name or IP address of the agent relay, if used. Proxy Port HTTP port of the agent relay (20080), if used. -
Click Save.
Remotely installed agents start running automatically. If a remotely installed agent stops, you need to restart it on the host machine.
For other methods of installing agents, see Install agents.
Dynamically register agents
To dynamically register agents, specify internal agent names, which are resolved automatically on remote machines. Property values are taken from these locations:
- Agent: System and Java properties that are collected from an agent when it connects to a server.
- System: Located in Administration > System > Properties.
Use short and full notations to specify an internal agent name:
- Short:
${propertyName} - Full:
${p:propertyName}
When an agent connects or reconnects to a server, the server resolves the agent's name by reading its properties. When you modify an internal agent name, the server updates the name with the value that you specified. The server notifies you if the change succeeds or fails.
If you specify a conflicting name, the agent's regular name is modified with a suffix. This enables you to change the internal agent name on the server at a later date. Conflicting names are enabled by default. This behavior is controlled by the Allow conflicting name for agents setting in Administration > System > System Settings.
 See also:


